Eliminating Air Bubbles in Molds and Casts

There are different mold making and casting equipment that can be used to make bubble-free molds and casts. The suitability of a given equipment depends on the nature of the material and other factors.

One of the most taxing things when making a mold or cast is dealing with the air bubbles. Some air is bound to get trapped into the material no matter how carefully the artist mixes and pours the material. Once set, this shows up as unsightly warts on the surface of the mold/cast and makes it mostly unusable.

Fortunately, there are various tricks and even mechanical equipment for eliminating these pesky air bubbles. While pouring the material in a thin and steady stream from a corner and pricking the bubbles with a pin can help to some extent, it is always better to use an apparatus like vibrating table, pressure pot or a vacuum pump with vacuum chamber.

This brings us to the question – which of these equipment is the most effective in getting rid of the trapped air in the mold making or casting materials?

Well, there is no single-point solution as such.

A vibrating table uses the simple technique of pulsating the material to shake out the bubbles. This will reduce the bubbles but cannot deair the material completely. Careful pouring will reduce the propensity of bubbles for sure.

On the other hand, a pressure pot is best suitable for materials that will cure to a rigid form. Like resins for example. It is better to avoid pressure casting soft rubbers as the air bubbles are bound to return once the mold or cast is exposed to normal air pressure. A rubber mold or cast is even likely to collapse in the areas where air remains trapped under the surface.

A vacuum chamber with pump is best suited for removing air from the rubber materials. Artists usually leave the rubber mold or cast to cure in the vacuum inside the chamber and the air will not return later!

All mold making and casting materials and equipment can be easily sourced from the EnvironMolds website, https://www.artmolds.com.

Preparing for Making a Life Casting

There’s a lot that goes into making a life casting. The procedures and materials may vary, but the artist will always need to prepare his studio and pay particular attention to the model’s well-being.

There are many different ways of making a body mold for life casting – some artists use alginate, some prefer skin-safe silicone rubber, while some simply use plaster bandages to capture the shape and size of the abdomen or torso. Even the life cast can be made in plaster or even with resin for cold casting to replicate the look of stone or metal.


It goes without saying that every life cast is a beautiful work of art and it should be appropriately finished with a brass name plate. This name plate will announce the name of the artwork and the artist along with other details like date of creation.

When starting with the life casting, the artist needs to prepare the place and the model for what lies ahead. It is better to protect the floor with plastic sheets or other covering. Keep hand towels handy. All the required materials and supplies should be kept ready to avoid undue delay while making the body mold. The studio should not be too cold or too warm either. There should be bathing facilities so that the model can wash off the residue once the mold is removed.

In a similar vein, the artist should brief the model about what lies ahead. Discuss the pose and practice it beforehand to ensure proper comfort. Props and supports can be provided if needed. Emphasize the need to stay calm and stationary while the work is in progress. Explain the process so that the model is aware of what will happen.

Finally, the artist should work carefully and without taking too much time over the process.

Life casting artists can procure all the required materials, tools and supplies – like alginate, plaster of Paris bandages, mixers, spatulas, rasps and even name plates engraved – from the EnvironMolds website, Artmolds.com. They also provide instructional materials, workshops and personal guidance, as needed.

Polyurethane or Silicone – Which Mold Rubber to Use?

Polyurethane and silicone rubbers are the most popular mold making materials because of their versatility and ease of use. So, which of the two options will actually suit a particular application?

There are a variety of mold making materials for capturing negative impressions of artworks and other models. The options range from the simple clay, wax and alginate to sophisticated materials like polyurethanes, latex rubber, silicone rubber, thermoset mold rubber and so on.

Each material comes with its own set of advantages and disadvantages. The choice will depend on various considerations that includes the material of the model, the choice of casting material and even the personal preference of the mold maker, to name a few.

Yet, it emerges that polyurethane mold rubber and silicone mold rubber are usually preferred by mold makers owing to different factors like the versatility of the materials, the inherent ease of use and also the durability of the molds.

So, let’s take a look at how an artist would choose between polyurethane rubber and silicone rubber to understand how these factors play out in reality:
  • Polyurethane mold rubber is a popular option for casting wax, plaster and especially concrete. Concrete casts are usually made in polyurethane rubber molds only as silicone may cause efflorescence in the castings. Silicone rubber is preferred when the artist has to go on to cast polyester, epoxy and polyurethane resins. In other words, silicone rubber is usually used for making a resin casting.
  • Generally, both polyurethane and silicone rubbers can be used on any model of any material without causing any damage. However, if the artist is making a body mold from a live human being, they have to use special skin safe silicone rubber only.
  • While the mold rubber itself will not damage an inanimate model, the release agent can definitely have an adverse effect on the surface. Therefore, in case the artist cannot or does not want to use a release agent, silicone rubber will be the material of choice since it does not stick to anything except itself. However, it follows that silicone rubber molds cannot be used for making silicone rubber casts!
  • Polyurethane rubbers are more economical than the highly expensive silicone mold rubbers. It is obvious that an artist will prefer the polyurethane variant whenever it is suitable.
  • The final choice will also be influenced by the dexterity of the artist. Many artists prefer to use a particular mold making material just because of the familiarity and comfort level with the same.

It is possible to play around with these factors depending on the circumstances too. For instance, polyurethane rubber molds can be used for making hundreds of plaster, wax and concrete molds while silicone molds are suitable for large quantity of resin castings without any distortions or damage. However, in case the artist requires only 10 to 20 resin cast parts, they may opt for polyurethane rubber molds since it is easier on the pocket. But using a release agent will become mandatory!

Handy Kits Available at EnvironMolds

A variety of mold making and life casting kits are featured on the EnvironMolds website. This serves as a quick and easy introduction to these specialized arts. The options are varied and interesting.

EnvironMolds offers an extensive range of mold making, casting and lifecasting kits that are especially handy for beginners. The kits contain all the required materials, supplies and tools for a one-time project.

For instance, the Latex EZ Casting kit has everything needed to create molds of a Trilobite fossil and a life-sized snail followed by a casting. Accordingly, it contains Kreemtex Liquid Premium Mold Making Rubber, CastRite Art Stone, Chavaunt clay, fossils, mixing cups, mixing sticks, brushes, cotton swab and fine cheesecloth. The materials are of studio quality; the quantity and size are suitable for the project on hand. It also comes with an illustrated instruction guide that demonstrates each and every step with full clarity and detail. The directions are easy to follow and the process becomes interesting and enjoyable.

The life casting kits are a complete delight as well. In fact, the company website http://www.artmolds.com features the largest collection of life casting kits available anywhere. There are various kit options for casting a baby's hand and foot, adult hands, faces, torso and even the full body. They are helpfully marked as beginner, experienced and advanced levels.

For instance, the Pro Hand EZ Cast Kit is perfectly suitable for serious life casters who want to turn this artistic hobby into a part-time business. This bestseller has actually been tested and approved by 60 members of the reputed Home Arts Magazine Club. Yet, even novices can use the kit to create museum-quality sculptures. It is also used by professionals to create hand castings for profit at various venues.

The beauty of the kits is that the user does not have to assemble all the nitty-gritty materials for making a mold, cast or life cast. The quantities are appropriate, thus eliminating guesswork while purchasing individual projects. Moreover, the user will also get an idea about what and how much to buy when working on similar projects in the future.

Getting To Know Your Alginate

Alginate is the material of choice for making body molds for life casts. It is easy to use, easy to mix, skin safe and eco-friendly too. You will surely find something suitable given the broad range of options.

Alginate is the most commonly used material for making body molds. It is a natural substance derived from seaweed and is safe for the skin. It is easy to use as well.

Mixing is a straightforward process – take alginate and water in the specified proportions and they will mix easily to form a gel-like substance. A rapid mixing for 15 to 20 seconds will yield a smooth and creamy consistency that is ready to use. Small quantities can be mixed with hand but larger batches require a turbo mixer or speed drill.

The mix ratio is usually 1 part alginate to 3 parts water. However, the ratio changes depending on the formulation and some brands allow a much greater coverage with a mix ratio of 1 part alginate to 7 parts water.

However, care is required over the type of water used in the mix. Always use soft water (opt for distilled water if unsure) for mixing alginate as hard water will make the mix lumpy and ineffectual.

Once applied on the body, alginate will capture excellent forensic detail. The fine body hair, lines, wrinkles and even fingerprints are accurately copied in the mold and can be reproduced in the life cast.

What’s more, alginates are eco-friendly as well. Some of the formulas actually enrich the soil. Therefore, used alginate molds can be easily discarded without worrying about the effect on the environment.

That’s not all either. Alginate comes in a wide variety with silica free formulations available as well. The type of set can vary from regular to soft (for babies) and options of set time are also available ranging from 2 to 3 minutes, 4 to 5 minutes and even 5 to 7 minutes. There is fiber-infused alginate as well that offers improved tear strength and delayed shrinkage.

Life casting artists can easily source the various types of alginates from the EnvironMolds website, https://www.artmolds.com.

Varied Types of Clay at EnvironMolds

EnvironMolds opens the doors to a wide range of plasticine and ceramic clays to suit varied uses. The options range from Roma Plastilina and Del Milano to pottery clay and include ballistic clay too.

Clay is an important art material that is used by mold makers, sculptors, potters and other artists in many ways. Plasticine clay is especially popular for its non-drying and reusable properties. It displays good flexibility and adhesive properties and is regularly used for mold making, mask making, sculpting, special effects and clay animation.

The EnvironMolds website (www.artmolds.com) offers a complete range of molding clay to suit varied uses and budgets. The premium grade Roma Plastilina clay is available in varying degrees of hardness – soft, medium and hard - to suit different applications. Del Milano is a budget option, yet on par with Roma Plastilina in terms of quality. This is a non-sulfurated variant that comes in handy for silicone and urethane rubber mold makers as it will not inhibit the setting of these materials.

The industrial grade Chavant clay is also sulfur-free and is available in brown and gray-green colors. The unique feature of this clay is that it can even be melted and poured like other casting materials! Once it returns to room temperature, it will set by regaining the initial firmness.


In addition to this, regular pottery clay – from Dresden and Artware – is available too. These are suitable for ceramic works and prove to be quite adaptable. These clays set to a smooth, brilliant white finish while Stoneware clay is a moist option that turns bone hard when allowed to dry.

Apart from this, there is another variant of molding clay called ballistic clay. Surprisingly, this clay is considered to be of similar density and elasticity as live animal muscle tissue. Therefore, it is used by government agencies to test body armor and even in forensics. In fact, the Roma Plastilina No. 1 ballistic clay is specified by government agencies for ballistics testing.

Therefore, all kinds of clay modeling options can easily be sourced from EnvironMolds, that too at the best prices.


Art Supplies Available at EnvironMolds

The EnvironMolds website features an interesting array of art supplies that are distinctive, top quality and handy as well. It includes eyes, body parts, paints, makeup, name plates, mounts, etc.

EnvironMolds specializes in providing easy access to everything to do with mold making, casting and life casting materials. It’s not just about materials, tools and equipment needed for creating these intricate artworks. The website, Artmolds.com also features an Art Supplies tab that encompasses a wide variety of unique and useful art supplies to support these arts.

This includes eyes and body parts, makeup supplies, paints and dyes, craft kits, marble and wooden bases and name plates engraved. Let’s take a look at some of the offerings:

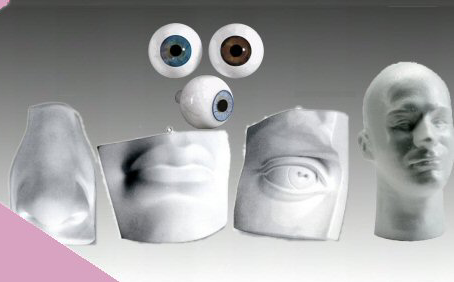
•    The eyes and body parts feature realistic looking glass and acrylic eyes for life casts and sculptures. This includes flat backed, semi-round and fully round eyes along with hand blown ones (with or without veins). Larger-than-life plaster study casts of body parts are available for studio reference and the Styrofoam mannequin head can be used for mask making.

•    The paints and dyes section opens up specialized paints and pigments that are compatible with latex, silicones and polyurethanes. Skin-safe body paints are also available in a variety of colors.

•    The makeup supplies offer extensive options in high quality makeup products - face and body paints, eye makeup, brushes, applicators, bald caps, etc. - that are perfect for theatre as well as personal use.

•    The bases in wood and marble are just the thing for mounting a sculpture and give a finished look to the artwork. These are available in different shapes, sizes and colors to suit the sculpture.

•    A brass name plate engraved with the title of the artwork and the name of the artist lends the perfect finishing touch. The life cast or sculpture will get a professional look akin to the galleries! There are options in sizes, type of corners and lines of text.

•    The craft kits have an interesting lineup of options ranging from making pot castings, leaf castings, fossil castings to even life casts of the hand or feet.


Silica Free Versions in Alginate

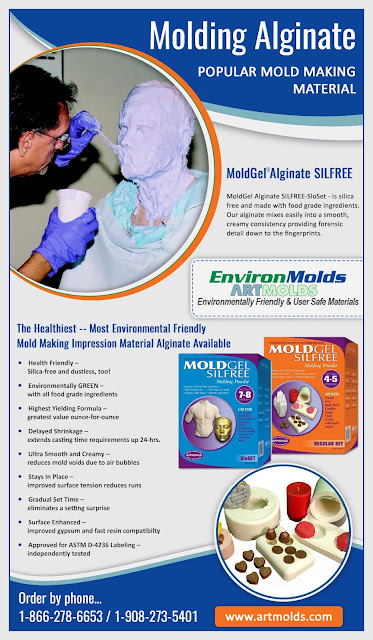
MoldGel Alginate SILFREE is considered the healthiest, safest and most environment friendly alginate formula in the market. It is silica free which makes it suitable for use on baby skin too.

Alginate is a simple dental impression material that lends itself well for making body molds. It is a natural material derived from seaweed and considered completely safe for the skin. The powder is mixed with water (in the defined proportions) and applied directly on the body to capture impressions for making life casts.


However, the alginate powder does contain some amount of crystalline silica which is considered a carcinogen. Even though the silica content is on the marginal side, EnvironMolds has developed a special silica free and dust free formula called MoldGel Alginate SILFREE.

This is made with food grade ingredients and is both environment and user friendly. To add to this, it is the only alginate that is fluoride free and lead free as well.

The powder mixes easily to give a smooth, creamy consistency which helps reduce mold voids due to air bubbles. It also yields greater coverage because of the mix ratio of 1 part powder to 7 parts water, (compared to 1:3 ratios for regular formulae). In fact, this has emerged as the highest yielding formula as it gives greatest value ounce-for-ounce.

Apart from the economical factor, the silica free Alginates provide excellent forensic detail down to the fingerprints. The delayed and gradual set time (4 to 5 minutes in MoldGel Alginate Silfree regular formula and 7 to 8 minutes in SloSet) allows a considerably longer window for working with the alginate mix. It further boasts of delayed shrinkage too and the casting time limit is extended up to 24 hours!

Finally, as MoldGel Alginate SILFREE is gentle on the skin and yields a softer set, it is ideal for casting hands and feet of babies and small children.

The formula is available in 1lb, 10lb, 20lb and 50lb packs on the EnvironMolds website, Artmolds.com. Other variants like Hollywood Impressions SILFREE and LifeMold Silica Free Alginate are also available.

Using The Best Latex Casting Rubber

RD 407 Mask Making Latex is considered the best liquid latex casting rubber not just for making masks, but also gloves, props, coating and other uses. It is easy to use but does require some careful handling.

Liquid latex rubber is a popular mold making material because of its tough, durable, tear resistant and economical aspects. The same is also used as a makeup and special effects product to create varying effects for film and theatre.

In addition, there is latex casting rubber variants which are less viscous than the mold making latex rubbers. These are commonly used for making hollow toys, props, puppet heads and masks. In fact, RD-407 Mask Making Latex is considered the industry standard for making latex masks, props, gloves and a skin over polyurethane foams. This is a high quality latex that is favored by professional artists for masks, body parts and other thin skin latex products.

Latex casting rubber is very easy to use when compared to other casting materials. It comes in a ready-to-use liquid form and just has to be poured into the mold. It is swished properly in the mold and allowed to sit for a couple of hours before being poured out again. The latex that remains clinging to the sides of the mold will dry gradually and can be peeled out to become the actual thin skin cast.

Apart from making masks and props, the same RD 407 latex rubber can also be used to coat fabrics for waterproofing and insulating tools. Dipping the model into the latex and allowing the coat to dry before repeating the steps will build up a suitable protective coating over the same. Alternatively, the same latex can also be used to coat foam that has been carved into the desired shape.

A latex cast can be sanded, painted and finished as required. It will be elastic and flexible but still stays durable for years to come. Even the amount of hardness and flexibility of the rubber casting can be manipulated by adding an extender and filler like RubRfil.


Care during use

 
Liquid latex rubber is a simple product that can be used easily. It has a long shelf life and can be used whenever desired.

In case a stored latex rubber turns thick, it can always be thinned by adding some distilled water to get the desired consistency. The ammonia in the latex will also tend to evaporate. In case the ammonia smell is diminished, adding some aqua ammonia from a chemical store will restore it back to normal. However, latex should never be allowed to freeze as this will render it unusable. Special handling is necessary during the freezing months of winter.

In sum, casting latex rubber is a multi-use product that is commonly used to make latex mask but has other useful applications as well. In fact, it can be used to create almost any effect as a cast or directly on the skin as well.

Casting in Single and Two-Part Molds

The casting procedure will vary depending on the technique used for making the mold. Casting a single piece mold is easier than a multi-part one, but the results will definitely be up to the mark.

The simplest process of mold making is to cover the model with an appropriate mold making material and let it set properly. Once cured and demolded, the covering will reveal a negative impression of the model complete with all the grooves, nooks and other details.

Different techniques of making molds – such as block, blanket, glove, poured, slush, etc. – can be used depending on the type of model and choice of materials. A model that is too floppy, has undercuts or does not have a flat bottom will even require the mold to be made in two or parts, called a multi-part mold.

Irrespective of the method and type of mold, once it is ready it is time to make the positive through the casting process. Here, the actual procedure for casting will vary depending on whether it is a single or multi-part mold.

Single mold casting – Casting in a single piece mold is quite easy. All that the artist has to do is mix the casting material of choice and pour it into the mold. The cast will set in some time and can be demolded before allowing it to cure completely. Care will have to be taken about applying a release agent, eliminating air bubbles and the like. However, the process still remains straightforward and the cast will be ready once it is finished and polished properly.

Multi-part mold casting – Making a mold in two or parts is definitely a complicated and time-consuming process. It follows that the casting process will not be simple either.

The process begins with aligning the different parts of the mold based on the keys. Once the mold comes together properly, it should be secured using heavy-duty bands. Backing boards will also be required in case the mold is flexible.

After securing the mold, the casting material can be mixed and poured into the mold through the sprue or air hole. Care is required again to ensure that the mold is full of the casting material and it reaches every indentation and undercut of the mold. Applying a release agent and eliminating air bubbles is obligatory yet again.

The cast is then allowed to set inside before removing the bands and pulling the mold parts apart. The cast can be removed and allowed to cure further. Cleaning, finishing and painting can be done as needed.

In sum, the techniques for casting in single and two part molds may be a bit different, but the final cast will definitely not leave anything wanting as long as the procedure is properly followed.

Once the cast is ready, it can be displayed or used as planned. Even the mold can be used to make multiple casts if it is not torn down when demolding the cast.


Face Cast – Lying Down or Sitting Up?

Making a life cast requires meticulous attention to a range of details. Whether the model is posing in a horizontal or vertical position can also make a world of difference to the face mold and life cast.

Life casting is a beautiful art of replicating the human body in its three-dimensional form. The entire body or any specific parts can be represented in a life cast. While people do commission life casts of their hands, feet, breasts, pregnant belly, torso and so on, the face cast remains quintessentially popular.

Alginate is usually the material of choice for making a body mold. The material is safe for the skin, dries quickly and can capture the fine indentations of the body.

The actual process of making a life cast begins with counseling and prepping the model for the session. The life casting artist will clarify possible discomfort, safety precautions and other details with the model. He or she will secure the model’s hair and apply a fine coat of petroleum jelly so that the alginate does not tangle in the body hair.

It often happens that the model may prefer lying down during the process. The artist too may agree thinking that it will keep the model at ease and allow for easy application without any movement.

However, they should keep in mind that lying down in a prone position will pull the skin down and can cause the face to distort slightly. The change may not be visible to the eye but will show up in the body mold. Moreover, the additional weight of the alginate mix and plaster bandages that are applied subsequently also have to be considered. This can make the face cast look flawed or even disfigured.

Therefore, it is always better to have the model sitting upright for the face cast. The pose also has to be planned and tested carefully. Even holding the face at an angle can make the life cast look deformed.

In sum, life casting is a challenging art that requires careful planning and precision of various parameters.

Artists can source the alginates, plaster and other materials from the EnvironMolds website, https://www.artmolds.com.


Sealing Mold Box Is Essential

Some mold makers skip sealing the mold box thinking that even if the mold making material tends to leak from the edges, they can always clean the mess later. But can you really afford to do so? Find out why….

One of the first steps for making a mold is making a mold box. This is a structure that is used to contain the model. For making a small rubber or resin casting, a cup, bowl or bottle can easily serve as the mold box. However, it is essential that the ‘box’ should be able to contain the entire model. That’s not all – it should also allow sufficient space around and over the edges of the model so that the mold making material can form a thick rim around the model.

Mold makers often use different materials to make the mold box – think cardboard, plastic, acrylic sheets, wood, metal or even lego blocks to form the containment field. Ready-to-use mold boxes are also available in art stores and these can be adjusted to suit the dimensions of the model.


Irrespective of the type of mold box, it is essential to seal and caulk the mold box properly. Else, consider this - leaving a mold box with a leak to cure overnight is likely to result in a half-complete mold in the morning!

So, isn’t it better to create a waterproof seal around the edges of the mold box? Applying glue or clay around the exterior perimeter and up the corners of the box will seal the edges and keep the runniest of mold making materials from leaking out of the mold box. Plasticina clay is considered best for this purpose.

Another important step is to apply a release agent inside the mold box and glue the base of the model to the bottom of the box. This will ensure that the model does not shift while the mold making material is poured into the box. Demolding will be easy as well.

All materials like clays, polyurethanes and rubbers along with supplies can be easily sourced from EnvironMolds at https://www.artmolds.com

Opening The Eyes In A Life Cast

It is customary to make a head cast with closed eyes. But it will look real only when you can ‘open’ the eyes during the casting process. Expert sculpting skills will stand you in good stead here.

Life casting is an artistic process of making a beautiful likeness of a person. The three-dimensional creation surpasses the images produced in photographs and paintings and gives it an incredibly realistic impression, right down to the natural creases, the usual pores and even the real texture of your skin.

Once the body mold is done and the cast is ready, the finished life cast can be mounted on a suitable base. Adding a brass name plate engraved with your name and other details will be the final touch that gives a professional and gallery-like finish to the artwork.

The results look amazing, but getting there is replete with intricate complications. One of the most challenging aspects of making a life cast is getting the eyes right in the body mold.

The life casting artist will obviously apply the skin safe alginate or silicone rubber all over the eyes. The gooey substance is carefully worked over the lids and into the corners of the eye sockets to capture the contours in detail. This will create a life cast head with closed eyes. After all, it is virtually impossible for a model to keep the eyes open during the life casting process!

However, the closed eyes will make the head cast look akin to a death mask. Opening the eyes is what will add ‘life’ and make it look natural.

Experienced life casting artists have persevered to work out effective ways to sculpt the eyes open.


It is after a lot of trial and error that an artist will be able to make accurate incisions to remove the ‘eyes’ from the face mold. Exceptional sculpting skills are required to carve new eyes as if they are open. It involves shaping fully open or half closed eyelids with clay or plaster. The cavities and the lower lids also have to be sculpted and chiseled with infinite care and patience. Painting and other finishing techniques are used to create realistic eyes in the final life cast.

Alternatively, some artists also use prosthetic eyes to give their life cast a realistic effect. They carve out the sockets in the body mold and fit glass or acrylic eyes into the head portrait. This may seem easy at the outset, but it still requires proficient sculpting to fashion the eyelids and shape the corners in the mold.

Ready eye forms are available in art stores that look natural and add a lifelike appearance to the life cast. They should be chosen with care to suit the shape and color of the model’s original eyes. Some artists even prefer to make their own eye forms with resin and add detailing to the same.

Whatever ‘eye-opening’ method you use, do not forget to add brass name plates engraved once the life cast is ready for display.

Making Perfect Casts From Molds

Mold making is deeply entwined with casting. In fact, it is impossible to make a cast without making a negative impression of the model in the form of a mold. Learning both the arts becomes essential.

The casting process always begins with how to make a mold. The artist can choose the mold making material and the technique depending on the nature of the model, the preferred casting material, personal dexterity and so on. While the mold can be made using clay, wax, plaster, resin or rubber, the method can vary from simple block molds to more complicated blanket molds using the brushed, poured or glove mold making system.

Here, the artist also has to decide whether they will be making a mold in its entirety at one go or in parts. The latter is quite an intricate and time-consuming process. But it becomes essential if the model has deep indentations, protrusions or undercuts. This calls for making keys and sprue holes in the parts of the mold as well.

Once the mold parts are ready, the artist can move to the casting process. First timers often wonder if the cast will also be made in parts and need to be fused together later.

This is not actually the case in reality. In fact, making a cast in multi-part molds is similar to casting in a single piece mold save for a few extra steps.

The casting process

The mold parts are thoroughly cleaned and dried before coating with a release agent. Then the parts will be lined up using the keys so that they align properly. Mold straps or heavy duty rubber bands are needed to bind the mold parts together and keep the casting material from leaking out. In case the mold is flexible, backing boards are placed on either end of the mold to keep the mold from bending or collapsing on itself. The bands go over the boards and hold the entire arrangement in place.

Now all that is required is pouring the casting material into the mold through the sprues. This should be done slowly to avoid air bubbles. The mold is tapped a few times to allow the plaster, rubber or resin to fill the indentations and settle everywhere properly. It is advisable to continue pouring till a bit of the material starts flowing out from the holes.

The mold should be allowed to sit for a couple of hours or even overnight to ensure proper curing. Once set, the bands can be removed and the mold parts separated with a gentle hand. This will reveal the cast in its entirety!

The cast is then removed and finished with sandpaper and paints as needed.

Therefore, newbies need to know how to make molds and casts of different types before attempting any project. Perfection comes with practice and they can learn the tricks through trial and error. Very soon they will also be able to create flawless casts from impeccable molds.

EnvironMolds to The Rescue of Novice Artists

If you have no clue about which material to use for making a mold, cast or life cast, the EnvironMolds choose by Applications feature will suggest suitable products for various types of artworks.

EnvironMolds has consistently emerged as a leading provider of all kinds of art materials, supplies, tools and equipment for mold making, casting and life casting. Over the past 20 years, the company has incessantly expanded its product range to embrace various top brands apart from the in-house ArtMolds. In the zeal to assist artists in every way possible, they also provide access to instructional articles, videos and books on various topics related to these arts.

The user-friendly website Artmolds.com is the doorway to a plethora of products. It covers almost everything that any artist can ever require. Now, veteran mold makers and life casting artists can easily find the products they need from the range of materials listed under the associated tabs.

However, what about the novice artists or those who want to try their hand at mold making or life casting? How will they know which materials they should choose, let alone which product will be best suitable for a project?

EnvironMolds seeks to solve this dilemma for the beginners who are not certain about which product will be appropriate for their work. They can click on Applications that will open up various application groups along with product suggestions for the same.

The vast list of categories covers various art forms – from art casting, cold casting, culinary mold making, mask making, sculpture reproduction, body casting and life casting to antique restoration, garage models, fossil preservation, doll reborning, ballistic supplies and more. A click on the category you are interested in will provide a list of associated products along with helpful instructional videos on topics related to that art.

Along with this, there is also a handy Product Application chart that lists the various ArtMolds products along with their properties and various applications of the same. You can crosscheck to understand the features of your chosen products as well as the other uses of the same.

Vacuum Pump and Chambers For Your Art Studio

Mold making and casting will usually require a vacuum chamber and pump for eliminating trapped air from the material. Otherwise the air will end up marring your artwork and make it look unsightly.

Resins and rubbers are the most commonly used materials for making molds and casts. They are easy to use, capture details well and prove to be durable as well. However, the chief issue with using these materials is their propensity to trap air easily. This ends up as wart like indentations that create hideous surface defects on the finished castings.

The best way to eliminate the air bubbles is to use a vacuum pump with vacuum chamber. All you have to do is mix the resin or rubber and place it in the vacuum chamber. The vacuum pump will use pressure to pull out the air from the chamber and create a deep vacuum inside.

Therefore, this equipment makes a perfect addition to a mold maker or casting artist’s studio. The EnvironMolds website Artmolds.com provides a range of studio equipment including vacuum pumps and chambers. The ArtMolds vacuum chamber with pump is very popular among artists because of its low cost, professional grade quality and safety. The chamber has a 4 gallon capacity while the pump can pull up to 29 inches of mercury (Hg) at sea level, which is ideal for deairing pot life resins and silicones. The vacuum pump and chamber can be bought together or separately as well.

Apart from this, you also have the option of RotoKinetic vacuum chambers that are available in three different sizes – 1.25 gallons, 2 gallons and 5 gallons. They come with a built in solid state vacuum pump and require only an external compressed air supply. Alternatively, you can also order the vacuum chamber without the pump - a vent valve will be supplied with shutoff valve.

Similarly, the website also offers other vacuum pumps like USG Two-Stage 3 CFM Vacuum Pump, Robinair 6 CFM Vacuum Pump and Venturi type compressed air vacuum pump. All of them work well with the ArtMolds vacuum chamber.

The When and How of Two Part Molds

Mold making is not always as easy as ABC. But it’s not like rocket science either. You should know when you need to make a mold in more than one simple part and the intricacies involved in the same.

Making a block mold of a model is a simple and straightforward process. However, there are some models that demand two part molds!

Suppose the model has a protrusion – like a mug with a handle. This will make it difficult to remove the model and later the cast from a single piece mold. Or, if the model has a narrow base when compared to the rest of the body – again, extracting the model becomes tricky. In fact, it is just not possible to get the model out of the mold without breaking it apart!

So, why not make the mold in parts itself?

Indeed, multi-part mold making involves making separate parts of the mold that will come together to form a complete mold. The process begins with forming a parting line on the model. This will divide the piece in such a way that the part to be molded does not have any undercuts that will impede its removal from the mold later on. Most times, two mold parts will do; however, intricate shapes may require three or even more parts.

Next you have to cover the mold till the parting line, so that only the part to be cast is visible. This is usually done using clay. While at it, you will also have to mark sprues and keys on the clay surface along the parting line. The sprue forms the opening for pouring in the casting material while the keys are a set of identical protrusions and indentations that will allow the mold halves to align accurately.

Now make the first half of the mold and once set, remove the clay before making a mold of the other half as well. Later, you can easily separate the two parts to reveal the model inside. The two part mold is ready for casting in the material of your choosing.

For more information on the materials and steps for making two part molds, contact EnvironMolds or check out their website, https://www.artmolds.com.

Uses and Types of Clay


You will be surprised to know that something as simple as clay not only enjoys a broad range of uses, but also comes in a range of variations. The choice obviously depends on the use, so pick accordingly.

The simple and malleable clay is the ideal modeling material for amateurs as well as veteran sculptors. The ease of working and extreme versatility makes clay a popular choice that gives other sophisticated materials like rubbers and resins a run for their money!

Indeed, the use of clay modeling extends across genres – from basic ceramics and pottery to making molds and sculptures to masks, prototypes, special effects and even clay animation.

Different variations of clay are available – there is oil and water-based clay, sulfur and sulfur-free clay and hardening as well as non-drying clay. The choice depends as much on the texture and hardness of the different materials as the potential reproductions of the finished piece. The personal dexterity and preference of the artist also matters here.

For instance, the water-based clays are much softer than the oil ones. But the latter do not dry out or shrink as easily. In fact, the high grade ones are even permanently pliable and can be used over and over again.

The most common uses of clay are sculpting and pottery. Here, the artist usually uses the water-based clays and they are not bothered about the drying as the finished piece will be fired in a kiln to harden it permanently.

However, when an artist is making an initial model for a prop, prototype or prosthetic, they may prefer the oil-based or non-hardening varieties. This allows them a longer window to mold the clay as it will not harden on exposure to air. What’s more, they can even reuse the same clay many times after the casting is done. There is a varying choice of hardness as well to suit different applications.

Most of the clay options contain sulfur and this does not affect the sculpture, mask, prop or prototype as such. The only hindrance is that the sulfur can inhibit the setting of various silicone rubbers. As such, when an artist plans to cast the clay mold in silicone rubber, he has to consider sulfur-free clays.

Apart from these, there is a special type of ballistic clay that is surprisingly handy for testing body armor. This clay simulates animal muscle tissue and can be used as backing for ballistic vests to test the deformations from varying bullet shots.

When it comes to which clay to purchase, the oil-based Roma Plastilina is the first choice of seasoned sculptors for clay modeling. Del Milano plasticine clay is another good variant of the same class, yet less heavy on the pocket. For prototyping and automotive design usage, Chavant offers top quality industrial plasticine clay in both sulfur and sulfur-free variants. Roma Platilina’s ballistic clay is the government-designated backing material for terminal ballistics testing. And if you need moist and self-hardening clays for pottery and ceramics, there are quality offerings from Dresden, Artware and Boneware.

Using Sodium Silicate in the Art Studio

There is practically no limit to the varied uses of sodium silicate. It can be used in artwork and beyond to aid production in factories as well. The utility value in the studio itself is very diverse.

There are many multi-purpose materials, and then there is ArtMolds Sodium Silicate. This comes in very handy in the art studio as well as in daily life. For instance, it can be used in ceramics, metal mold making, clay slip deflocculant, sealer for concrete and plaster, adhesives etc. It is equally useful in cements, passive fire protection, refractories, textile and lumber processing and automobiles.

Apart from the versatility, the product is also odorless, non-toxic and moisture resistant. The low price further adds to the appeal and utility. Let’s take a look at some of the regular uses of liquid sodium silicate:
•    The most common use of sodium silicate is to mix it with fine sand before exposing it to carbon dioxide. The activated silicate binds the sand to form a core or mold. This can be used for making metal castings.

•    Did you know that you can create instant antiquity on pottery too? All you have to do is brush a thrown ceramic piece with sodium silicate and dry it quickly with a blow torch. The heat will swiftly form a thin skin on the surface while the clay inside still remains soft. Using pressure to expand the clay from inside will cause the sodium silicate skin to crack and give a glazed finish to the ceramic.

•    The same sodium silicate also works as an effective deflocculant for clay slips. Just add a small quantity of liquid sodium silicate to clay and mix it will. This will reduce shrinkage later as you are not using water.

•    You can apply sodium silicate on a model or mold made of plaster, gypsum or concrete. This will seal the surface and control its porosity. Masonry can be made waterproof in this manner as well.

•    A thin layer of sodium silicate will dry to form a strong and rigid bond between any two materials.

You can source sodium silicate or water glass from EnvironMolds website, https://www.artmolds.com.


Tips for Storing Latex Rubber

Liquid latex rubber is good for use almost indefinitely. However, this is subject to proper storage so that outside air cannot come into contact with the material. Simple precautions will help.

Latex rubber is a natural material that is derived from rubber trees. It is versatile and easy to use. You can use it to make molds and casts or even to create special effects. It is equally usable for making masks and thin skin props or toys as for coating tools or making materials waterproof.

The rubber is available in a liquid form and can be used directly without mixing with any solvent. Simply pour the liquid into the mold and pour it out again, dip the tools in the latex or apply successive coats to build up a thick layer of latex rubber. The latex will be tough, durable and tear resistant even when in contact with abrasive surfaces.

What’s more, liquid latex allows a sufficient window of pot time before it will start to set. You can work comfortably while you build up successive layers of latex on the model or mold.

The latex also has a long shelf life and can be stored for years. It will continue to deliver the same functionality and ease of use. However, it is important that the container should not be left open after use. In fact, latex rubber should be stored in an airtight container and kept away from direct sunlight. If the container is exposed to heat, the rubber inside will take on a pinkish tint. But this still does not affect its workability.

One rule of thumb is that the latex should never freeze as it will become unusable. Special care is required during the freezing winter months.

In case you find that the latex rubber has thickened for some reason, the mixture can always be thinned by adding water or household ammonia. The thinning agent should be added slowly while stirring gently. But do not thin the latex too much as it will weaken the strength of the material.

You will find a wide selection of latex rubber options along with other materials and supplies at EnvironMolds, https://www.artmolds.com.


How To Mix Alginate?

Alginate is easy to work with and delivers excellent results as long as you follow certain pertinent rules about measuring and mixing the alginate. Know what you should and shouldn’t be doing with alginate.

You almost cannot imagine making body molds and life casts without alginate. This ever-resourceful compound comes in the form of a simple white powder. In fact, it is very similar to what dentists use for making tooth impressions.

The alginate used in life casting is fun to work with. All you have to do is mix it with water to form a smooth and creamy paste. Applying it all over the body part to be cast and reinforcing it with a shell mold will yield a detailed mold that meticulously captures the fine hair, skin folds and fingerprints too.

However, you need to work carefully when mixing the alginate. The first rule is to always weigh out the powder to get the ratio exactly right. This is because alginate is compressible and measuring the quantity by volume will wreak havoc on the proportions. Use a weighing scale and always make a little extra mixture than required. This will prove handy as the alginate tends to set very quickly and you may not have time on hand in case the mixture falls short.

Another rule of thumb is to always use soft water for mixing alginates. If you inadvertently happen to use hard water, you will end up with a lumpy mess that is mostly unusable. In a pinch, use mineral water rather than risking the unknown tap water!

You can even play around with the temperature of the water to vary the expected set time of the alginate paste.

When you are actually mixing, always place the powder in the container and then pour the required water and not vice versa. Blend them rapidly, but take care not whip air into the mix. Rather than whisking by hand, use a turbo mixer on a variable speed drill to get a smooth and lump-free paste.

Always source your alginates and other materials from reliable suppliers like EnvironMolds (www.artmolds.com).


The Experience of Life Casting

Far from being an agonizing or unpleasant experience, getting a life cast done can actually turn out to be quite easy and even enjoyable! Why not open yourself up to this soothing pleasure once?

The beautiful art of life casting opens up a novel avenue of getting a three dimensional likeness of yourself. You can choose any part of your body and the life cast will reproduce the exact surface features in all their glory.

However, many people still hesitate to get a life cast done. They despair that they will find it intolerable when the life casting artist actually makes a mold on their body. While hands and feet are considered acceptable, getting the gooey mold making material on their face or torso can seem quite awful at first. They are also nervous about having to hold a stationary pose for the body mold making process.

The Reality is Different!


Once you go in for a life cast, you will be surprised to find that body casting is not a distressing experience at all! It actually feels like a gentle massage when the artist applies the mold making alginate or silicone rubber on your body. On the face, it is akin to a soft facial.

Being enclosed in the warm mold making material while it sets can truly be quite soothing. The body feels loose and relaxed.

And holding the same pose will not really be very difficult. Firstly, the artist will ensure that you are totally comfortable in the chosen position. He will provide supports if needed and also instruct you on how to breathe calmly. You will discuss signals in case of any distress.

Staying quiet and still in the same pose for an extended time can further relax the body. You will enter a tranquil state of meditation and may even fall asleep during the process.

Little wonder that models that are frequently hired for regular body casting eagerly look forward to this serene experience!

You can find out more about life casting and what it involves on the EnvironMolds website – https://www.artmolds.com

Different Types of Rubber

Rubber material can be classified into distinct families based on its properties and usage. The varying rubber options can be used for different types of mold making and casting applications.

Rubber is essentially a simple material that is derived from the sap of trees. This milky white, sticky and elastic material has become almost indispensible in the world of mold making and casting.

The rubber is available in many different types and forms. Think – latex rubber, polyurethane rubber, silicone rubber, thermoset mold rubber and you will get the picture.

It goes without saying that each rubber has its own distinct properties and the use varies accordingly. Moreover, the same rubber is formulated differently to suit mold making and casting applications.

 For instance, liquid latex can be used for capturing molds from rough surfaces or when you have to cast abrasive materials. The economical material can even be applied to vertical surfaces or models where they are itself without the risk of run-off. It is particularly favored for creating special effects on actors. In its casting form, the less viscous latex rubber proves to be very useful for making latex masks, props and other thin skin products.

On the other hand, silicone rubber is more expensive, but it is still widely used for making silicone molds and casts. This rubber can be used for various applications – even food safe and skin safe variations are available. While the former is suitable for food molds, the latter can be easily applied on the human body for making life casts. The main advantage is that silicone does not stick to anything but itself – this allows for easy demolding from the model or mold.

While artists tend to use mold making silicone rubber for casting works too, special variants have also been developed. A skin-colored, translucent option makes doll reborning possible – it is soft and stretchable like skin, but still stays tough and tear-resistant like all other rubbers.

Similarly, polyurethane or thermoset mold rubbers come with their own distinct properties and usage.

You can check out the various rubber families and their use on the EnvironMolds website, https://www.artmolds.com

Cleaning a Clay Mold

There are different clays and it’s quite easy to work with them. Cleaning your clay mold is also a simple process. Just don’t make the mistake of soaking the clay in water as this will damage the mold!

Clay is a simple and versatile material that has become the modeling material of choice for all kinds of people. Children enjoy playing with regular water-based clay which becomes hard when exposed to air. On the other hand, there is plasticine clay that stays moist no matter how many times it is used.

Then there are oil-based clays, sulfur-free clays, pottery clays and even self-hardening clays. Some clay comes in different colors and even varying degrees of hardness. These are used by different artists depending on the type of artwork and other preferences.


One of the common uses of clay is making molds for casting projects. It is malleable and can be easily shaped over the object to create a negative impression mold. The mold can stay soft and reusable or become hard depending on the type of clay used. Different materials can be cast in a clay mold like plaster, resin, rubbers, etc.

Once the clay mold is ready, you will want to clean and finish it before proceeding to the casting end of things. Casting artists usually wash their molds with water or even soak them for a while to get rid of the excess mold making material, release agent, etc.

However, you should take care never to wash or soak a clay mold. This can cause the mold to break, crack or just reduce the life of the mold.

If you want to clean it, just wipe it with a wet cloth, sponge or soft toothbrush. Else, spray a fine mist on the mold before wiping it off. In fact, try to do the cleaning soon after demolding from the model as cleaning dried clay becomes more difficult. The same process can be followed for cleaning the mold after the casting is done.

You can easily order Plastilina clay and other materials as well as get a lot of handy tips or guidance from the EnvironMolds website, https://www.artmolds.com.