Showing posts with label Plaster casting. Show all posts

Mastering Plaster Casting: Unveiling the Secrets of Plaster of Paris Bandages

If you've ever been curious about the art of plaster casting, you've come to the right place. In this comprehensive guide, we delve deep into the world of casting, shedding light on the wonders of Plaster of Paris bandages and Plaster bandages. Whether you're a seasoned artist or a DIY enthusiast, our exploration of these materials and techniques will ignite your creative spark.

Rediscovering Art Through Plaster Casting


Art has the remarkable ability to transcend time and connect us to the creative spirits of our ancestors. From ancient civilizations to contemporary artists, plaster casting remains a medium of choice for its versatility, durability, and the unique charm it adds to artistic creations. In this comprehensive guide, we will embark on a journey through the captivating world of this casting, focusing on the incredible properties and applications of Plaster of Paris bandages and Plaster bandages.


Plaster Casting

The Art of Plaster Casting:


It is often simply referred to as plasterwork, is an age-old art form that involves creating three-dimensional sculptures and molds using plaster materials. It is a technique that has been practiced for centuries, dating back to ancient Egypt and Greece. Over the years, it has evolved and diversified, finding its place in various artistic disciplines, including sculpture, mask-making, and even medical applications.

It starts with the selection of the right plaster material, and Plaster of Paris stands out as one of the most widely used and beloved choices. Its popularity is attributed to its easy workability and ability to capture fine details.

Unveiling the Magic of Plaster of Paris:


At the heart of casting lies the versatile and enchanting material known as Plaster of Paris. Contrary to what the name suggests, Plaster of Paris has roots in Montmartre, a district in Paris, France, but its use has spread far beyond the city's borders.

What makes Plaster of Paris truly magical is its unique properties. It is a white powder that, when mixed with water, forms a paste that quickly hardens into a solid mass. This rapid setting time makes it ideal for creating molds and casts with intricate details. Whether you're crafting sculptures, masks, or relief panels, Plaster of Paris delivers remarkable results.

Crafting with Plaster Bandages:


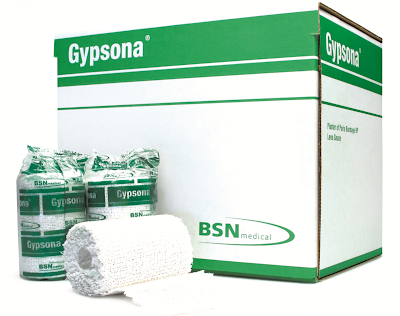
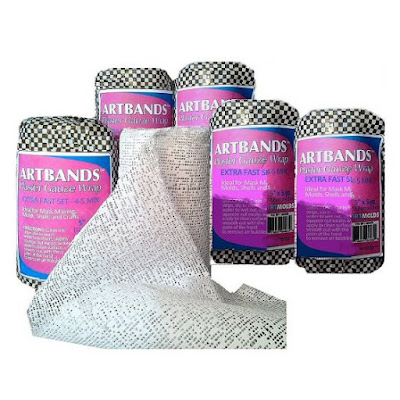
Plaster bandages are another indispensable tool in the world of casting. These are gauze-like strips coated with plaster. They are known for their flexibility and convenience, making them a popular choice for artists, medical professionals, and DIY enthusiasts.

One of the key advantages of plaster bandages is their ease of use. They can be quickly immersed in water, and after a brief soaking, they become pliable and ready for application. Artists can use them to create sturdy support shells for sculptures and masks, or even for making life casts.

Step-by-Step Guide:


For those eager to dive into the world of casting, here's a simplified step-by-step guide to creating your first plaster cast:

  • Prepare Your Workspace: Lay out all your materials, including Plaster of Paris, water, mixing containers, and your chosen mold or object.
  • Mix the Plaster: Gradually add water to Plaster of Paris until you achieve a creamy consistency. Be mindful of the setting time – Plaster of Paris can harden quickly.
  • Apply the Plaster: Apply the plaster mixture to your chosen mold or object. Make sure to press it into all the details.
  • Remove Air Bubbles: Tap the mold gently to release any air bubbles trapped in the plaster.
  • Let It Set: Allow the plaster to set. The time required can vary depending on the thickness of the plaster and the ambient temperature.
  • Demold: Once the plaster is completely set, carefully remove it from the mold.
  • Finishing Touches: Sand, paint, or decorate your plaster cast as desired.

Remember, practice makes perfect, so don't be discouraged if your first attempts aren't flawless. It is both an art and a craft, and proficiency comes with experience.

Tips and Tricks for Perfect Casting:


To help you on your casting journey, here are some valuable tips and tricks:

  • Measure Accurately: Ensure precise measurements when mixing Plaster of Paris and water. Use a scale if necessary.
  • Work Quickly: Plaster of Paris sets rapidly, so have everything prepared and ready for casting before mixing.
  • Mind the Temperature: Warmer temperatures can accelerate the setting time, so adjust your workflow accordingly.
  • Safety First: Wear appropriate safety gear, including gloves and eye protection, especially when mixing and handling plaster materials.
  • Experiment and Learn: Don't be afraid to experiment with different techniques and molds. Each project is an opportunity to learn and improve.

Exploring ArtMolds: Your One-Stop Shop:


As you embark on your casting journey, you'll need a trusted partner who can provide high-quality supplies and expert guidance. Look no further than ArtMolds! Our commitment to excellence and passion for the arts drive us to provide artists, educators, and DIY enthusiasts with top-notch casting materials, tools, and resources. Whether you're a beginner or an experienced artist, you'll find everything you need to bring your creative visions to life.

To explore our extensive range of products and access our wealth of knowledge, visit us at https://www.artmolds.com today. Join our community of artists and artisans who share your passion for plaster casting and creativity.

Conclusion:

In conclusion, plaster casting is a timeless art form that continues to enchant and inspire. Plasterof Paris bandages and Plaster bandages are the cornerstones of this craft, enabling artists to breathe life into their imaginations. Whether you're a seasoned artist or a novice looking to explore a new creative outlet, the world of casting welcomes you with open arms.

Are you ready to embark on your plaster casting adventure? Dive into the world of creativity and imagination with ArtMolds! Explore our high-quality casting supplies, step-by-step tutorials, and expert guidance today. Visit https://www.artmolds.com/ now to unleash your artistic potential! Your masterpiece awaits.

Creating, Recreating and Reinforcing with Plaster

Plaster is an adaptable material that has been commonly used since time immemorial. Therefore, many traditional as well as contemporary works owe their existence to the ever-versatile plaster!

Plaster is a simple powder made of gypsum, sand and lime. Simply adding water to the material will form a paste that can be used in many different ways. The very first thought is obviously in construction works, not just for plastering walls but also to create frescoes and other reliefs.

In direct contrast to this are the plaster bandages which are used to form shell molds that will reinforce the original mold and help it retain its shape. Then there are other varied uses like making original sculptures and other decorative elements apart from casting in molds to make replica casts and even life casts. Plaster can be carved after drying, which further increases its utility.


Getting into plaster casting


Making a plaster cast is as simple a task as anything can be. All it requires is mixing the plaster powder with water to get the desired consistency before pouring it into the mold. Once it has hardened, the mold can be removed to reveal an exact replica of the original model. What’s more, numerous replicas can be made in quick succession in the same mold as the plaster will set and cure pretty quickly.

However, alginate body molds tend to shrink on exposure to air and cannot be reused. Moreover, plaster also tends to give off heat while curing and therefore, should be used with caution.


Getting into plaster shell molds


Using plaster of Paris bandages to form a mother mold is another story altogether. This is nothing but thin gauze that has been impregnated with plaster powder and is available in the form of rolls. The usual method is to cut long strips of the gauze before wetting them with water. Gently squeeze out the excess water and apply it over the mold to form a covering. The bandages should be applied in an overlapping manner with each layer being smoothed out with a gentle hand to ensure that air does not get trapped in between and warp the mother mold.

Plaster gauze is generally used with alginate, silicone rubber and latex rubber molds. As these molds are flexible; they tend to flop over during the casting process which can distort the casting. The plaster in the gauze will harden to form a rigid covering which encases the flexible mold and helps it retain its shape.

In sum, plaster is a relatively inexpensive material. It is easy to use and does not take much time to set, thus giving quick results. The beauty of this simple material is that it has been an intrinsic part of many artistic movements of the olden days and yet manages to retain its utility till date! In fact, there’s so much more that can be done with plaster – the only limit is the imagination for sure!


Tips for Working with Plaster for Making Castings

Fine art casting plaster is the material of choice for making casts. This is high-definition and yet easy to use as long as the proper mixing and pouring directions are followed. Find some more tricks here.

Plaster is considered the most common medium for making casts. It creates a rigid form with a lovely white finish that will stand the test of time. Plaster casting is often favored by artists over and above silicone or polyurethane rubber, and for good reason at that. In fact, it is the material of choice for making life castings as well.

However, the plaster used for castings is not the regular plaster of Paris as it tends to get chalky and flaky and will not be able to hold details well. Special plaster powders are available that have distinct additives and have been heat treated which alters these natural properties of plaster. In this way, it becomes suitable for fine art casting as the plaster cast can hold details without chipping or cracking.

This material is quite easy to use. Just mix the plaster powder in the specified quantity of water and it will be ready to use. Keep in mind that the water should be at room temperature and it is better to add the plaster powder to the water and not vice versa. The mixing can be done by hand (with gloves) or an electric mixer while taking care to avoid air from entering the mix as it can lead to air bubbles in the cast.

The plaster mixture is quite workable. One of the secret tricks is to apply a thin coating all over the surface of the mold and allow it to set a little. Then pour the mixed plaster slowly and in a thin stream to avoid air pockets.

It will set and cure naturally to a fairly hard structure. In fact, the cast should be demolded when it has set hard, but still feels a little on the wet side. There is no need to worry as the plaster can still be carved or tooled even after it has cured. Just sprinkle some water to wet the surface and it will be ready to use.

Another tip is that working with plaster can get quite messy. Therefore, artists prefer to clean as they go to keep the dust and waste from piling up. Also, keep in mind that plaster should never be applied directly on the body as the material releases heat as it cures which can cause burns at times. However, plaster bandages are sometimes used to make form body molds.

Best option


CastRite Art Casting Stone is a fine plaster powder that gives a natural, bright white finish to the castings. It can be used for making figurines, statuary, picture frames, life castings and even restoration works. All castings will turn out detailed, strong and durable. Enjoy the smooth plaster surface finish in the casts and life casts!

Correcting Mistakes in Plaster Life Casts

Errors are bound to happen at different stages of the body casting and life casting process. Here we take a look at the problems that can surface in a plaster life cast and how to correct some of them.


Life casting begins with capturing a mold of the human body and ends with a finished cast that is an exact reproduction of the model. The body mold is usually made using alginate or skin-safe silicone rubber while plaster is preferred for the life cast. The final piece is usually mounted and finished with a brass name plate.


Now there is a lot that can go wrong during the body casting and life casting process. While a lot has been written about working with alginate, let us take a look at the possible complications that can arise during the plaster casting:

Air bubbles – Like any other mold making or casting material, plaster also has a propensity to trap air that can show up as unsightly bubbles on the surface of the cast. Life casting artists are always advised to pour the plaster slowly and carefully in a thin stream from a corner of the mold. Tilting the plaster-filled body mold a bit or tapping the sides will also cause the trapped air to rise to the top and can be burst easily. However, if some bubbles still happen to appear on the life cast, they can be smoothed out with the thumb, back of a spoon or by applying some water. Some artists pop them gently with a knife and then fill the hole with more plaster. Rubbing with sandpaper will help level out the final cast.

Broken fingers – Features like nose and fingers are small and delicate when compared to the entire life cast. They are very likely to break during the demolding process – it could be that the plaster has not set enough or the artist has applied too much pressure or is working in a hasty manner. The broken part can be refastened by wetting both the edges and applying some plaster. Reposition the piece and hold it in place till it sets properly. The joint can be smoothed with a wet finger or some thin plaster.

Similarly, other distortions or squashed features can also be corrected with some careful resculpting. However, it is always better to make the corrections in the body mold itself as far as possible rather than risk disfiguring the life cast.

Rough surface of the casting – At times, the plaster surface of the casting may seem coarse and bumpy in places. This can happen due to various reasons like skewed ratio or improper mixing of the plaster. Either way, the best recourse it to smooth out the surface with sandpaper.

These techniques will work for minor errors and corrections. In case of a major blunder, it is better to redo the life cast rather than keep trying to correct an inherently flawed or inadequate piece.

And when the perfect piece is ready, it can be mounted on a marble or wooden base and finished with customized brass name plates engraved for that wonderful gallery finish!

Varied Uses of Plaster

 Plaster is a simple powder that is mixed with water before use. The material cures slowly to capture the shape in a solid form. This plaster can be used in varied ways to suit different purposes in the arts.

Plaster is a humble white powder made with a combination of lime or gypsum with sand and water. It is mixed with water to form a stiff paste before application. It dries to a solid form in some time. It is usually known as plaster of Paris as the gypsum was mined in abundant quantities in Paris.

The most common use of plaster mix is to coat walls and partitions to make the surface smooth. It is used to make false ceilings apart from stucco work and rendering. It also lends itself well for decorative architectural moldings like cornices and corbels.

Plaster is also used in the medical field to make casts for immobilizing broken bones and supporting the fracture till the bones can set properly once again.

A variation of the regular plaster also finds its way into the world of mold making and casting. This is different from the regular plaster of Paris which tends to become chalky and flaky over time, does not hold detail well and is hydroscopic in nature.

The art variant of plaster is harder which allows it to capture crisp details and set to a smooth solid. Yet it can be carved or tooled as desired. This is used in mold making and latex slush molds while plaster bandages are used to make shell molds or even form molds.

Plaster can be used for general mold making, but care should be taken as the material tends to emit heat due to the chemical reaction. Therefore, it can damage the product or harm the model when applied directly on the body. Some people have been known to get burns when plaster is used in large volumes!

A better application of plaster is for making the life castings. The plaster mix is poured into the alginate or silicone body mold and allowed to cure. After demolding, it turns out a bright white life cast that is a spitting replica of the original body part. It can then be finished as required before being put up for display.

Plaster is coated over gauze to form plaster bandages that can be used to make shell or mother molds. The wet bandages are smoothed out over alginate or rubber molds. They dry to a rigid form and thus lend the required stiffness to the flexible molds that would otherwise flop over themselves making it difficult to cast properly. The same bandages can also be used on the skin to make rough body part molds like the abdomen as they do not have much detail. Artists also use the same technique for making a face mold for making masks.

EnvironMolds offers a range of plaster options for pottery, casting and the ever-popular Plaster of Paris bandages.
 

Gypsum vs Plaster – Know the Difference

 Gypsum is usually considered to be the same as plaster. However, it should be noted that gypsum occurs naturally and plaster is derived from the gypsum by treating it with heat to eliminate the water.


There are very many materials used for making molds and casts. Plaster and gypsum are one of the common casting materials as plaster casting is quite a popular medium with casting artists.

The terms gypsum and plaster and used interchangeably and most people consider them the same thing. The confusion abounds as both of them basically contain the same calcium sulfate compound. However, there are intrinsic differences between the two materials.


Gypsum is a naturally-occurring material containing calcium sulfate dihydrate. It is formed in the seas at the right temperature. It is considered a rock-forming material and can grow up to large sizes. Gypsum has a crystal structure but contains water. The crystals are either transparent or translucent – they can be colorless or white, though other shades like grey, red or yellow are also found on occasion. Gypsum is soft, flexible and slightly soluble in water.

When gypsum is heated at temperature between 150°C to 180℃, it loses water and takes the form of calcium sulfate hemihydrates. Certain additives are added during the heating process and it is then ground to powder form which is called plaster of Paris.

Therefore, plaster is a man-made material – the white powder is basically derived from gypsum. It is mixed with sand and water – and some fibers at times – to form a smooth solid. The moist plaster is used to mold different items and will turn hard as it dries to retain the desired shape. Therefore, plaster of Paris is commonly used as a protective coating on walls and ceilings as well as for making decorative castings. It is also used to make orthopedic casts for setting broken bones and the like. At times, the same plaster is used to make toys, statuettes, chalk and even cosmetics.

However, it should be kept in mind that plaster of Paris in its original form is not actually suitable for casting purposes. This is because it cannot hold details well and also tends to turn chalky and flaky over time. The plaster powder is again treated with heat to make it suitable for fine art casting. Only then will it be able to create hard casts that can hold detail, not turn chalky and also resist chipping and cracking. The cast will have a natural white finish and will turn out to be extremely durable. This plaster cannot be used directly on the skin as it tends to emit heat during the curing process.

EnvironMolds offers a range of plaster options for making plaster casting along with plaster bandages. The latter can be used to make shell molds that support flexible molds like silicone rubber, latex rubber and alginate. They can also be used directly on the body to make form molds, like of the abdomen for belly casting.

Safety Precautions When Working With Resins

Resin is a commonly used material for making different types of casts. It is fun to work with especially when making artistic jewelry and other casts. However, some safety measures are needed.

Resin is a viscous material that slowly hardens and sets solid in the form of a plastic. It comes in various types – like epoxy, polyester and polyurethanes. Resin casting is very popular among professional artists and novices alike.

The uses are varied ranging from artistic jewelry and faux metal casts to small parts in manufacturing industries to 3D printing to even gluing things together.


While resin lends itself well to many a use, the artist has to handle the material carefully and keep the following precautions in mind:

  • Some resins are considered volatile chemicals and should not be allowed to come into contact with the bare skin. Even the catalyst can prove to be risky. Always wear protective gloves when working with resin. Use a plastic apron to avoid ruining the clothes with spilled resin.
  • It is better to wear safety goggles and use a respirator when working with large quantities of resin. This will help shield against the noxious fumes.
  • The work area should be properly ventilated with open windows and an exhaust fan.
  • It is better to spread some wax paper on the work surface before using resin. As resin will not stick to the wax paper, it will be easy to clean. The dried resin can be simply peeled off from some materials; else it can be cleaned with rubbing alcohol.
  • But never use the alcohol or other solvent in case the resin comes in contact with the skin. Try to wipe it off immediately with baby wipes. Sticky resin can be scrubbed off with soap or a pumice stone.
  • Maintaining the ideal environment is crucial when working with resin. 70°F is considered the standard temperature as the resin fails to cure properly if the studio is hotter or cooler. Therefore, an air conditioner or heater may be required.
  • The resin and hardener should be measured accurately using measuring cups. Do not go by ballpark approximations as it can again affect the curing of the resin.
  • The materials should be mixed carefully and thoroughly using stir stix for a couple of minutes to ensure a uniform mix. However, overmixing can also introduce air bubbles into the casting material.
  • Some air is bound to get trapped into the resin and will show up on the surface of the cast. This can be popped with a needle or heat gun. Casting in a pressure pot is ideal for eliminating the air bubbles.
  • The resin is likely to attract dust or animal hair while it cures and will end up ruining the resin casting. Keep the studio clean and cover the cast with a clear dome while it cures.
  • Above all, follow the manufacturer’s instructions and safety precautions to the T.

Why Use Plasticine Clay?


Plasticine clay lends itself especially well for mold making and casting works and is preferred by professional sculptors as well. And yet, many people confuse plasticine clay with regular modeling clay.
The confusion is actually justified as plasticine feels just like any other putty clay. However, what makes plasticine so popular is that it is an oil based clay that will never ever dry or harden, no matter how long it is left out in the open.
As Plasticine stays flexible, you don’t have to worry about the mold becoming hard or cracking either. And you can simply reuse the same clay after the casting is done. In case needed, the clay can even be warmed to make it soft and usable once again.
Plasticine comes in different degrees of hardness to suit varying applications - sculpting, mask making, mold making, special effects and so on. The soft variety is popularly used in animation and the harder ones are suited for industrial modeling. Automobile designers prefer to design their prototypes using this clay and the same is also used in claymation to design different movable characters.


And EnvironMolds - the popular online store for all kinds of art supplies - stocks various types of clays. EnvironMolds offers regular clay, plastilina clay and even sulfur-free variants that will not inhibit the setting of silicone mold rubbers.

Making Body Molds with Silicone Rubber

Think body molds; think alginates! Indeed, alginate is the material of choice for capturing molds from the live human body as it is completely safe for the skin. This natural organic material sets quickly and the level of detail is also superior.

However, alginate comes with its own set of drawbacks. For instance, alginate can easily tear during demolding. Even if you manage to demold properly, the molds tend to shrink on contact with air as the water evaporates. They will start losing details within a few hours itself and are mostly unusable after 24 hours or so. Therefore, you have to cast them quickly; within an hour or two at best. Again, these are waste molds as you cannot even consider using them for making multiple castings.

Moreover, you cannot cast resins or polyurethanes in alginate molds. They are mostly suitable for plaster casting only.

Another option

Not many people may be aware that silicone rubber can also be used for making body molds! Indeed, skin-safe silicone is available in the market and LifeRite Skin Safe Silicone from the house of EnvironMolds is a good option.

This 2-part RTV silicone rubber is suitable for life casting and can be easily sourced from Artmolds.com. The body molds will turn out tear-resistant and have a long life.

They can be used again and again for making resin, polyurethane or plaster casting, making it possible to replicate multiple copies using the very same mold!

Easy Fixes for Minor Life Casting Mistakes

Everyone makes mistakes. And most mistakes can be fixed. However, when it comes to taking molds from the human body and making a life cast, I always thought that there is no scope for blunders.

No matter how carefully I applied the alginate on my model, demolded the mold from the body and made a plaster casting, something always went wrong and I had to start all over again. My mistakes were proving very costly and also chipped away at my passion for life casting.

It was only recently when I came across some instructional material from EnvironMolds that I realized that many of my mistakes can actually be corrected! Accomplished life casting practitioner, instructor and author, Ed McCormick assures all readers that most beginners will tend to make mistakes during the mold making, casting and life casting processes.

He offers various studio tips and tricks for both fixing small errors as well as avoiding blunders in the future. He even provides his hotline and toll-free numbers where he is available for direct one-on-one assistance for any kinds of issues.

Ed McCormick reassures that mistakes are normal even for experienced artists and drives that the lapses should not deter us and we should continue to practice the art with confidence and take pleasure in our completed works.

So don’t fret over those tiny mistakes….. After all we are only human!

Water Glass Works as an Effective Deflocculant too!

I always thought that water glass or sodium silicate is mainly used for making sand mold castings and getting an antique finish on ceramics. I had vaguely heard that it works as a high temperature adhesive too, but was not aware of its binding and sealing properties.

However, it was only when I started working on clay slips for ‘gluing’ my clay pieces together, that I came to know that the same sodium silicate is the most powerful, economical and commonly used deflocculant for clay.

Sodium silicate will work to thin the clay or reduce its viscosity by dispersing its particles. This allows the slip to be produced with minimum water so that drying shrinkage can be curtailed as much as possible. This may sound hazy, but the simple effect is that sodium silicate works like magic! You have to see it to believe it.

However, you need to keep in mind that after a point sodium silicate starts having an opposite effect, i.e., it actually makes the clay thicker or flocculates it. This is why you need a precise formulation of clay, water and water glass, with the latter never exceeding0.5% of the entire formulation.

If you are wondering where to source this clay slip deflocculant, just turn to EnvironMolds. This leading manufacturer and supplier of all kinds of mold making and casting products and equipment also offers the versatile ArtMolds Liquid Sodium Silicate to suit different applications.

The ArtMolds Collection!

You couldn’t be more mistaken if you thought EnvironMolds was just about supplying art materials for making quality latex molds, plaster casting or life casting along with the tools and equipment needed for them.

EnvironMolds truly supports art and artists in every sense of the word. The company, under the aegis of noted life caster, Ed McCormick, does everything from providing instruction materials and organizing workshops to spreading awareness about the beautiful art of life casting.

In a bid to support fine life casting artists and build confidence in their abilities, EnvironMolds makes selective purchases from the artists’ life casting works and displays them in ‘The ArtMolds Collection’. Some of the artists whose works are currently on display are Jamie Brick, Roy Butler, Brent Cairns, Richard Tilloston, Seth Wolfson, MurSyeir and so on.

Their beautiful works like the Brennangel, Bisque Torso, Within Reach, Half Time, Metro Man and Communion occupy pride of place along with McCormick’s own works like the Las Crusix. You will be pleased to know that most of these works have been created (at least in part) by using the studio quality products manufactured and sold by ArtMolds.

Anybody can log on to the ArtMolds website and view these amazing works in ‘The ArtMolds Collection’. For those who want to know more about a particular artist, helpful links are provided to every artist’s website and his other works, wherever available. Viewers can also click on the pictures of the life casts to view the creation in all its beauty!

Make Duplicates of Missing Parts - the Mold Making and Casting Way!


A beautiful antique table occupies pride of place in my drawing room. But one of its rear legs had developed cracks and finally gave way with age. While this definitely did not look good, I was loathe to discard the lovely table that always brings back so many of my childhood memories.

Finding a replacement leg was obviously not possible and get a custom replacement made on order did not seem worth the high price.

After much lament, I decided to put my polyurethanes mold making and casting skills to use and make a duplicate leg on my own. I began by carefully screwing out the other rear leg and then made a rubber mold of the same. This took some cautious preparation and I was always wary of not damaging the original leg in any manner. And I have to admit that the leg mold did capture the entire carving and engraving patterns down to the finest details.

My next task was to make a polyurethanes cast from the mold and the leg turned out to be an exact copy of the one that had given way. The shape, texture and patterns were precise but I wanted a wooden piece to match the look and color of the table.

An artist friend then introduced me to cold casting powders that can replicate the look of wood and we worked together to get the right finishing to match the other legs of the table.

And viola! Now no one can even say that a leg has been replaced from the lovely table!