Encapsulation by Way of Clear Casting Resins

Embedding a special object or even a biological specimen in a clear casting resin is an easy way to preserve it for eternity! The clear quality of the resin ensures that the object stays visible on all counts.

There are casting resins and then there is clear casting resin! Indeed, while polyurethanes are being used for making different types of resin castings, there’s something special about clear resins!

What sets clear casting resins apart from the rest of their ilk is that they can be used for encapsulation. Indeed, the clear quality of the resin makes it perfect for embedding different kinds of objects. They will stay clearly visible from all angles and look beautiful while at it.

The objects to be encapsulated can range from leaves, flowers, buttons, shells and other small objects to even special keepsakes like a stamp, coin, ring or a photograph. The casting process is used to make different objects like paperweights, key rings and jewelry that look both attractive and unique due to the items encapsulated inside them. The same technique also serves well for making point-of-purchase displays, rapid prototypes, special effects, sculpture reproductions, giftware, etc.

On a more serious note, science also falls on encapsulation for preserving biological specimens, like insects, plants and even small animals.


How to do it?


Clear casting resin is available as a two-part polyurethane casting system. It is usually mixed one-to-one by volume. Special molds are available that are specifically designed for clear casting. However, most artists prefer to make their own molds to ensure uniqueness in every feature of their casting.

While the mold can be made of almost any material, silicone molds are considered best. Especially, molds made with platinum-cure or condensation-cure silicone material will help preserve the clarity of the casting.

The casting process involves pouring the mixed clear casting material into the mold before gently embedding the object in the desired manner. Prior to this, it is important to degas the clear resin as it is prone to trap air bubbles. A pressure pot will work well here and the casting can be left to cure in the pressure pot itself.

Color can be added to the resin during the casting process – in the form of pigments or dyes. This can create a wonderful marbling effect in the casting.

All clear casting resins cure at room temperature. The cured cast will be UV resistant and non-yellowing.

Points to note


Encapsulation is not as straightforward as simply placing the specimen in the resin casting. The object has to first be cleaned thoroughly. It should also be completely dry. Leaves and flowers will have to be dried to remove the moisture content, and preferably coated with a preserving chemical. Biological specimens call for careful handling.

When it comes to the choice of clear casting resin, the number one option is obviously AquaClear Clear Casting Resin. Available at EnvironMolds, this is optically clear and cures to a hard and non-yellowing resin.

Creating, Recreating and Reinforcing with Plaster

Plaster is an adaptable material that has been commonly used since time immemorial. Therefore, many traditional as well as contemporary works owe their existence to the ever-versatile plaster!

Plaster is a simple powder made of gypsum, sand and lime. Simply adding water to the material will form a paste that can be used in many different ways. The very first thought is obviously in construction works, not just for plastering walls but also to create frescoes and other reliefs.

In direct contrast to this are the plaster bandages which are used to form shell molds that will reinforce the original mold and help it retain its shape. Then there are other varied uses like making original sculptures and other decorative elements apart from casting in molds to make replica casts and even life casts. Plaster can be carved after drying, which further increases its utility.


Getting into plaster casting


Making a plaster cast is as simple a task as anything can be. All it requires is mixing the plaster powder with water to get the desired consistency before pouring it into the mold. Once it has hardened, the mold can be removed to reveal an exact replica of the original model. What’s more, numerous replicas can be made in quick succession in the same mold as the plaster will set and cure pretty quickly.

However, alginate body molds tend to shrink on exposure to air and cannot be reused. Moreover, plaster also tends to give off heat while curing and therefore, should be used with caution.


Getting into plaster shell molds


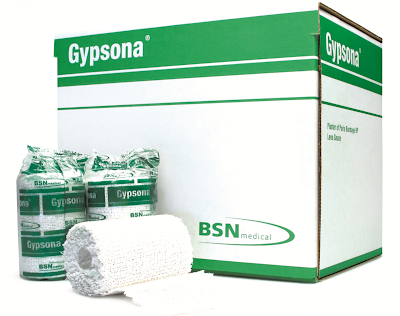
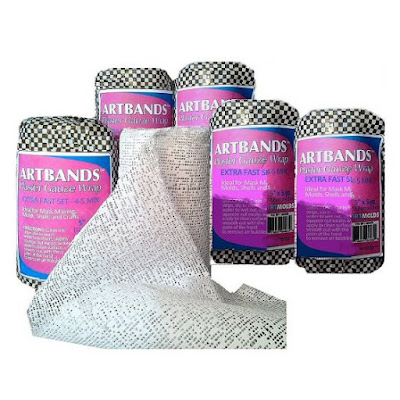
Using plaster of Paris bandages to form a mother mold is another story altogether. This is nothing but thin gauze that has been impregnated with plaster powder and is available in the form of rolls. The usual method is to cut long strips of the gauze before wetting them with water. Gently squeeze out the excess water and apply it over the mold to form a covering. The bandages should be applied in an overlapping manner with each layer being smoothed out with a gentle hand to ensure that air does not get trapped in between and warp the mother mold.

Plaster gauze is generally used with alginate, silicone rubber and latex rubber molds. As these molds are flexible; they tend to flop over during the casting process which can distort the casting. The plaster in the gauze will harden to form a rigid covering which encases the flexible mold and helps it retain its shape.

In sum, plaster is a relatively inexpensive material. It is easy to use and does not take much time to set, thus giving quick results. The beauty of this simple material is that it has been an intrinsic part of many artistic movements of the olden days and yet manages to retain its utility till date! In fact, there’s so much more that can be done with plaster – the only limit is the imagination for sure!


The How To’s of Latex Molds and Casts

Latex rubber is a versatile material that lends itself well for different uses. It is relatively easy to make latex molds and casts, though the processes vary a lot. Find out more about them right here.

Liquid latex rubber is an impressive rubber that finds varied applications on both the mold making and casting platforms. The rubber forms a thin and flexible skin which is used to make different items like gloves, swimming caps, rubber bands, balloons, catheters and other hollow-molded objects. The most common application is in making props apart from regular things like mattresses, tennis shoes and other sporting goods. The same latex finds its way into chewing gums and even serves well as an adhesive for bald caps. Not to mention that latex rubber is widely used as a special effects product to create wrinkles, scars, gashes and other simulations of injury, age or non-human characteristics for television, movies and theatre. The rubber lends itself well for making a latex mask which is popularly used for Halloween!


How to use?


One of the best parts about working with one of the most economical, resilient, versatile, tough, tear resistant and durable materials, latex rubber, is that it can be used to make both molds and casts. The mold making variations are generally more viscous than their casting counterparts, however, experienced artists even use them interchangeably.

A latex mold is usually made by painting the rubber on the model. This is a slow and lengthy process as it requires a good number of coats to build up the required thickness while allowing sufficient time for each subsequent coat to dry. This rubber can even be applied on models where they are, without the worry of the material running off the vertical surface. These molds can be used to cast plaster, polyester resin or urethane parts.

When it comes to latex casts, they are usually made in plaster molds. The process is quite simple and straightforward. Fill the mold with the rubber and allow it to sit for around 15 to 20 minutes before pouring off the excess back into the container. A thin layer of latex will remain in the mold. The plaster will slowly suck the water from the rubber, thus creating a latex ‘skin’, around 1/8th inch thick, inside the mold. The mold should be left as it is overnight or so for curing. The latex cast can be demolded after dusting the inner surface with talcum powder so that the latex does not stick to itself.

This is how latex masks are usually made. In case numerous copies of the cast have to be made, it is prudent to first make a master copy with rubber. This is because plaster molds tend to wear quickly. The master can be used to make subsequent plaster molds for repeated use.

The cured and demolded latex rubber cast can be finished using special latex dyes and paints before being used as desired.