What You Need for Mold Making and Casting

Making molds and casts involves a range of materials, supplies and equipment. Following is a look at the different items that should be kept at hand before beginning a mold making or casting project.

Mold making and casting are intricate arts that require different materials, supplies, tools and equipment. A lot of details are involved in these processes and it calls for careful and precise usage of the procedures as well.

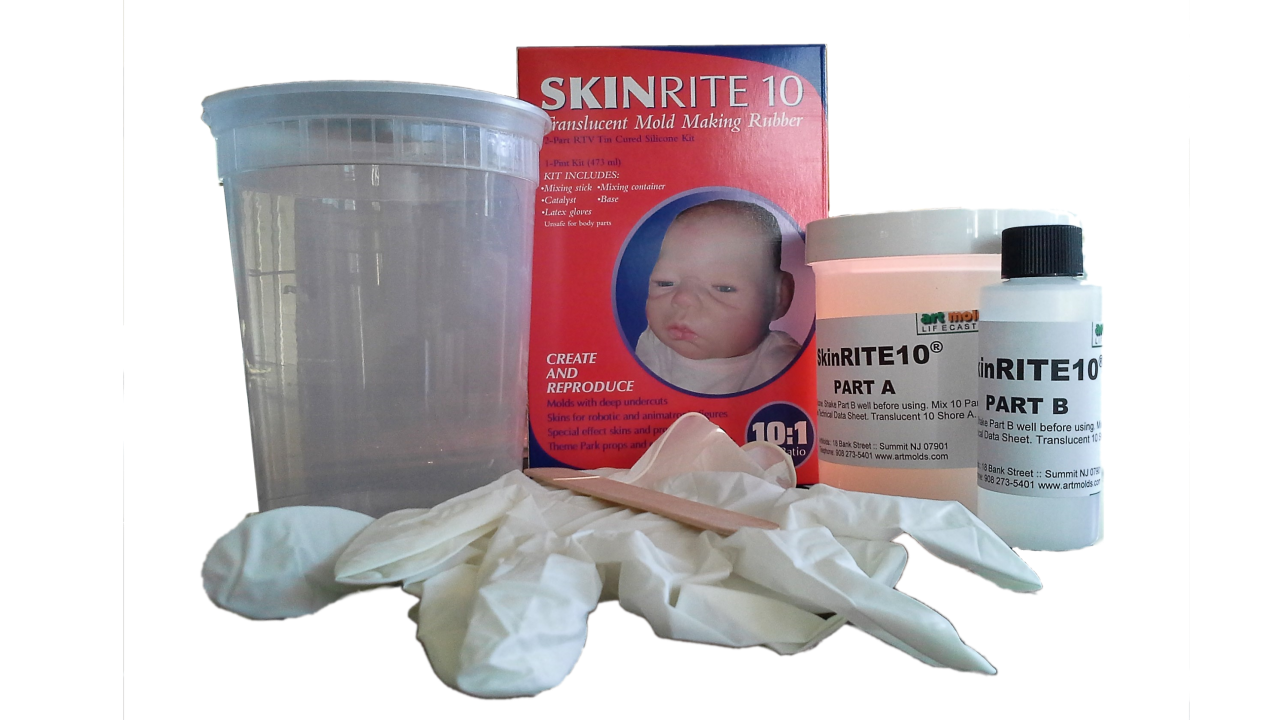
To begin with, there is a choice of a variety of materials like clay, wax, plaster, alginate, liquid latex rubber, silicone rubber, polyurethane resins and more. The selection depends on the technique, artist’s dexterity and preference. The common tools and supplies range from brushes, spatulas, gloves and containers to knives, rasps, scalpels, pliers, calipers, etc. In case the materials involve an element of risk to the artist, it is advisable to wear protective equipment like gloves, goggles, mask and coat. Some even use a respirator to prevent inhalation.
 
The mold making usually starts with a mold box and a base plate. The master model is either placed in the mold container or secured to the base with clay or a suitable adhesive. A sealant may be required if the model has holes or happens to be porous. Applying a thin coat of an appropriate release agent is usually recommended as it will help in easy demolding.

Again, depending on the mold making material, it may have to be degassed using a vibrating table, pressure pot or vacuum chamber with pump. This will eliminate air pockets in the material which show up as unsightly bubbles in the mold.

Once the mold has cured properly, the demolding process can involve cutting the mold with a sharp knife, scalpel or using other tools to extract the model from the mold. The mold is smoothened using certain specific tools before it is ready for casting.

In case the mold is made in two or more parts, it will require placing keys that facilitate an easy coming together of the mold parts. If the mold is very flexible, it may even have to be reinforced with a shell mold that is generally made with plater bandages.

The casting process usually begins with applying a release agent on all the surfaces of the mold to ensure easy demolding later. The material may also have to be degassed before pouring into the mold. Once the cast has cured, it is extracted using tools and finished as required.

The cast can even be painted to create the desired effect. Some rubbers and resins require special paints and dyes as the regular ones are not compatible with these materials.

Last but not the least; all the materials, supplies and other requirements – like say, latex rubber, silicone rubber, scalpel, mixer and vacuum chamber – should always be sourced from a established and reliable source to ensure that everything is of top quality and will work as expected. This will ensure best results in the mold making and casting.

The Various Facets of Sodium Silicate

The compound sodium silicate has many applications. While industry folks are familiar with sand molded metal castings, artists prefer to use it to deflocculate clay slip and create antique finishes on ceramics.

Sodium silicate is a simple inorganic sodium salt that is also called water glass. It comes in a flaked solid or powdered form which is dissolved in water to make an alkaline solution.

This silicate lends itself well to a host of uses that are quite varied in nature. Consider this – sodium silicate is equally effective in both treatment of waste water and preservation of foods. It is used in paper and detergents as well.

The same formula can also be used to reduce porosity in concrete, stucco and plaster. Applying a thin coat on masonry surfaces after they have cured will seal the surface, thus minimizing water penetration. In fact, sodium silicate displays excellent physical and chemical properties that are useful in bonding and coating applications. It will dry to form a tough, tightly adhering inorganic bond for metals, ceramics, glass, etc.

Apart from this, sodium silicate works as a deflocculant for clay slips and can also render an instant antique finish on ceramic surfaces.

But the most common and useful application is in metal or foundry mold making applications. A blend of sand and sodium silicate is used to make the mold. the mixture is packed into a core box of the desired shape and wires or rods are inserted as required for support. This is exposed to carbondioxide gas from a low pressure source or esters which induces a chemical reaction that will solidify the core. Once it has solidified, it is ready for use.

These molds are used in the iron, steel and cast iron industry. Molten metal is poured in the sand molds to make the casts.


Where to buy?


EnvironMolds is a veritable powerhouse supplier in the world of arts and crafts. The website is packed with a broad range of materials, supplies, tools and equipment for making molds, casts and life casts. All products are from leading brands with top quality, reasonable prices and environment safety being the differentiating factor across the board.

The repository includes sodium silicate from the inhouse brand of Artmolds. This inorganic multipurpose additive is formulated in aqueous form and can be used for different purposes. It is low cost, odorless, non-toxic, moisture-resistant and non-flammable too. As it is made from sand and alkali, it proves to be ecologically harmless in fresh water environments too.

However, it can irritate or burn the skin and eyes on contact. Observe safety precautions like wearing splash-proof goggles, rubber gloves and coveralls.

The company further advises that the product should be stored in a cool, dry, well-ventilated area, removed from oxidizing agents, acids, active metals, heat or ignition sources and foodstuffs. It should be protected from physical damage and sealed properly when not in use. If properly stored, unopened containers can be good indefinitely.

The Molding and Casting Approach to Making Replicas

Mold making and casting together form an efficient process for reproducing almost anything. There are clear differences between the two techniques and artists should know the ins and outs of both.

The most common method of making an exact three-dimensional replica of an object is molding and casting. In fact, most of the everyday items that people use in their homes and offices have undergone the molding and casting process.

Mold making


The mold forms the first step of making the replica. This is a hollow cavity of the shape of the model or master that is to be reproduced. It is also considered as a negative of the desired object.

Molds can be made with different materials and there are various techniques for the same. While anything like clay, wax, resin, silicone rubber, polyurethane rubber or thermoset mold rubber will lend itself well for making molds, the general consensus is that molds should be made with flexible materials as this makes it easier to demold the cast.

When working on molds, the mold making material has to be mixed properly and may even require a vacuum pump with vacuum chamber to ensure that it is free of air bubbles.

The best part about molds is that most of them are reusable and can be used for making multiple casts. But keep in mind that while some molds lose their shape quickly and are good for single castings only, others will also have a limited shelf life and will start to deteriorate with time.


Casting


While the mold is the first stage, casting forms the final stage that delivers the finished replica of the original model. A casting is usually made by pouring the casting material into the hollow mold. It is allowed to cure and then extracted to obtain the final product. This can be sanded, painted or finished as desired.

Here again, there are different techniques for casting and varied materials lend themselves well for the casting process. Yet, in general, it is better to use materials that cure to a hard form as this ensures efficiency in the process and durability in the final cast. The materials that are commonly used are plaster, gypsum, concrete and polyurethane resins apart from an assortment of rubbers. A vacuum chamber may again be required – especially for rubbers – to ensure that the cast is smooth and blemish free.

As the casting is the finished product, it obviously cannot be used in the process again and again. However, at times, casts are used to make secondary molds as they already hold the desired shape.

In sum, mold making and casting are used in conjunction to make duplicates of varied items. The have their own inherent characteristics and artists have to familiarize themselves with all the features before attempting to use them. These processes can also be used for other purposes like mask making and doll reborning. Life casting also draws on this to make reproductions of the live human body!

How to Choose a Mold Material Made Easy


Making a mold is a complex proposition that involves various factors right from the technique to the choice of material. Indeed, the material used to make the mold – be it clay, plaster, alginate, resin, latex rubber, silicone rubber, polyurethane rubber, etc. - will have a bearing on everything related to the quality, resilience, durability and even the very usability of the mold.

While different mold makers have their own specific criteria for choosing a mold material, there are some basic aspects that have to be kept in mind, such as:

  • Consider the material of the model. In general, it is better to pick a material that can be used on stone, wood, glass, metal, wax, plaster, ceramic or clay. In case of a body mold, the material should be safe for using on the skin, capture fine details and cure quickly too.
  • Take the characteristics of the model into consideration. Is the pattern simple with no undercuts or does it have a complex shape with deep undercuts? In case of a vertical surface or large/immovable objects, the model making material should be such that it can be applied on the details where it is without running off or needing to be thickened.
  • Compatibility with the casting material also has to be taken into account. Certain mold making materials may not be suitable for casting specific types of resins, rubbers or metals.
  • There are other aspects that warrant a closer look before closing in on an option – like catalyst, curing agent, working time and cure time at room temperature, etc. While at it, consider if the pot time and demolding time can be modified if needed.
  • Focus on the specific performance objectives expected from the mold/mold making material in terms of viscosity, appearance, durability, resilience, shore hardness, tensile strength, flexibility, shrinkage, tear strength, reusability and more.
  • In case of a flexible mold, a reinforcing shell mold will be required and the material compatibility factors will come into play again.
  • Consider the tools and equipment requirements of particular materials to ensure that the studio is prepped to work as required.
  • Take the mold features into account. For instance, a silicone mold varies in many aspects to a resin mold which will again be miles apart from a clay one.

Generally speaking, look for materials that are easy to use, can reproduce intricate details and are known to hold severe undercuts. It will be better if they also feature excellent release characteristics with customizable working times and cure rates. They should be flexible enough to tolerate the stress of demolding and be able to adapt to a range of service temperatures. Good resistance to chemicals and ability to withstand wear and tear with repeated use will also be helpful.

Getting a Casting Right

Casting is the art of making a replica of an object right down to its shape, dimensions and intricate surface details. The first step is to make a mold of the model before proceeding to the casting. The cast can be in the same material as the model or a different one like resin, rubber, plaster, concrete, etc. In case of an art work cast, it can even be displayed on a mount with a brass name plate.

Making the mold plays a crucial role as this will dictate the quality of the final cast. However, casting cannot be dismissed as a simple process of just pouring the casting material into the mold either. There is a lot that can go wrong with the casting in case of lack of proper procedures and caution.

  • Apply an appropriate release agent on the mold as this will allow for easy demolding without damaging the cast. However, going overboard can make the cast greasy and porous.
  • Ensure that the casting material is bubble-free by mixing it under vacuum or even pouring the casting in a vacuum environment.
  • Always shake the casting materials prior to use and follow the exact mix ratio as prescribed. This can affect the curing and make the cast soft, sticky or with weak spots.
  • The casting material has to be mixed properly by scraping the sides and bottom of the container. Otherwise, strips of uncured material will show up on the final casting.
  • Position the mold (and shell mold) properly as this can impact the shape of the casting. Always fill the mold till the brim to ensure that the proper dimensions and details are replicated in the casting.
  • Always check that the mold is not leaking in any manner. Close corners and seams with clay or other sealant to ensure that the casting material does not end up seeping out of the mold.
  • Temperature also affects the casting. Low temperature can increase the viscosity and processing time while too much time will accelerate the curing. Large temperature variances will impact the quality of the cast.
  • Follow the timelines of pot time, working time, cure time and so on. Allow the casting material to sit in the mold for the appropriate time to ensure that it sets properly. Demolding too soon is a strict no-no. On the contrary, do not leave the casting in the mold for a prolonged time either!

Finally, the demolded cast can be finished as desired and even displayed with a customized name plate. EnvironMolds (https://www.artmolds.com/) offers a range of quality name plates engraved with varied options for personalizing the same. Additionally, the art supplier manufacturers and stocks a complete arsenal of materials, supplies, tools and equipment for mold making, casting and life casting.

How to Make Molds Using Silicone Rubber?

Silicone rubber makes the most perfect mold reproductions that become the base for casts. Find out more about the different techniques of making silicone molds as well as how to use them in the casting process.

Silicone rubber is a versatile material that is commonly used in art studios to make molds and casts. It offers an interesting array of useful properties that lend themselves well to these arts. As a mold making material, it reproduces the precise shape of the model and can be used to make a wide variety of reproductions.

The common methods of making silicone molds is either pouring or lamination. In the former, the model is kept inside a mold box and the rubber is directly poured on to it. This process requires just a couple of steps and the mold is ready in the minimum time possible. It is preferred for making molds of furniture parts, ornaments and fine handicrafts.

The lamination method is also known as skin molding. It involves creating a skin of even thickness by laminating the rubber onto the model. The mold is reinforced with a shell mold. The process is not only quick, it also requires less quantity of material and results in a lightweight mold. This is the method of choice for reproducing artworks and other three-dimensional figures. It is also preferred for creating molds of large figures.

Both the methods will replicate even the minute surface details of the model in their entirety and become a perfect negative impression of the model.


Making the Casting


Once the silicone mold is ready and cured properly, anything from wax or plaster to resin can be cast in the mold to create a perfect reproduction of the model. Both the mold making and casting processes work beautifully as silicone rubber does not stick to anything (except itself). Demolding is a breeze and the flexible mold can be finished/corrected as needed before making casts.

The silicone molds are always durable and long-lasting. They can be used and reused any number of times provided they are cleaned and stored properly between uses. The casts will turn out perfect every single time. It is advisable to dust the mold with talcum powder before storing away from sunlight to ensure that the mold does not flop or become sticky.

What’s more, it is possible to even cast silicone rubber in these molds as long as a good release agent is being used. When it comes to finishing a silicone cast, it calls for special silicone paints as the regular ones will tend to chip and crack on the rubber surface.

Where to buy?


EnvironMolds (https://www.artmolds.com/) offers a varied collection of silicone rubber options for general mold making apart from specific purposes like food molds, body molds, 5 minute molds and even doll reborning. The materials are of excellent quality and yet priced vey reasonably. In addition to this, the special silicone paint is also available for finishing silicone casts.

Choosing a Life Casting Artist Made Easy

Understand what goes into making a body mold before commissioning a life casting artist for the job. This will ensure best results that you will enjoy forever instead of it becoming a waste of time and money.

Life casting opens up a wonderful medium of preserving a memory of yourself or a loved one, much better than a simple photograph or painting. The three-dimensional reproduction can become commemorative too!

In fact, it is possible to make a life cast of any part of the body, or even the entire body at one go. Some of the life casts preferred by most people include pair of hands, pair of feet, face, torso, pregnant belly, breasts and so on. Hands and feet are most popular with babies while many people prefer to get a life cast of holding something memorable in their hand or intertwined hands with a partner, child or even friends.
 

Life casting is fun and can prove to be a novel experience as well. However, there are certain factors to be kept in mind while getting a life casting done: Such as:


  • The procedure of making a body mold may look simple; but it requires a lot of considerations and care. It is advisable not to attempt to make a mold of yourself. For starters, it will be difficult to maintain the pose while applying the mold material on yourself. Instead, make molds of friends or at least ask a friend to help when working on yourself.
  • Life casting should always be done by a professional. There is a risk of burns, suffocation and even exposure to dangerous chemicals. Everything has to be done carefully with complete knowledge and requisite precautions. Choosing the right artist with the appropriate skill and varied experience is imperative.
  • The choice of materials also matters here to avoid dangers and harm to the body. The artist should use the right materials and always opt for good quality ones to ensure complete safety of the model at all times.
  • Check the interactions and comfort level with the life casting artist. He/she should prep the model vis-à-vis what goes into the body casting procedure, how to hold the pose, how much time it will take, possible discomfort and warning signs, etc. Ensuring complete comfort of the model throughout the process is also necessary.
  • The artist should offer options in the casting material, types of finish, mounting and so on.
  • Life casting is an expensive art and clarifying the price and other aspects beforehand is also crucial.
  • People looking to get a life cast should check out the previous works of the artist and pay close attention to the variety in the creations apart from clarity of detailing, finish and so on.

In sum, paying heed to the above pointers when choosing a life casting artist will ensure the process enfolds smoothly and the output proves to be satisfactory! Otherwise it may just become a colossal waste of time and money, not to mention the potential of harm.