A Life Casting Kit for Pregnancy!

The pregnant belly is a lovely memory of the beautiful journey of pregnancy. Looking at a replica of this swollen abdomen can bring back touching recollections to the fore every time, courtesy a belly cast.

Pregnancy is a beautiful experience full of ever-lasting memories. While the culmination is the most precious gift possible, the journey itself is something to be cherished forever. People try to capture the wonderful moments with pictures and other favored measures. However, hardly anything can do justice to the treasure trove of delights like a life casting!

Indeed, one of the best ways to preserve the experience is making a three-dimensional representation of the pregnancy in its full glory – in the form of a belly casting.

Come to think of it, capturing the shape of the pregnant abdomen is one of the easiest aspects of making a life casting. It does not even call for an expert hand – pregnant couples easily manage to do it by themselves. And a home kit makes the process all the more simple and straightforward, given that itcontains all the materials needed to create a beautiful belly casting work of art!

Getting Inside the Maternity Life Casting Kit


The Maternity EZ Cast Kit is characterized by quality materials and easy to understand directions.Each kit contains:

  • 90 yards of 4' plaster impregnated bandages-precut (6 rolls)
  • 3 ounces MoldEZrelease agent
  • 1 pair surgical grade rubber gloves
  • 1 plastic drop cloth

To begin with, spread the drop cloth on the floor, don the rubber gloves and get going. Keep in mind that while most other kits come with around 4 rolls of plaster bandages, this one provides 50% more material. This will be more than sufficient for a 160 lbs. model and the cast will have extra strength to last for years to come. It is advisable to order an extra packet of plaster bandages per 50 lbs. additional weight.

Making the casting requires you to simply follow the directions in the guide book to the T. Roll out the bandages, cut them into strips and keep a couple of bowls of water handy. Apply the release agent on the body before starting the process.

Each strip has to be simply dipped in the water and squeezed before applying on the abdomen. Smooth out each bandage to remove air bubbles but do not press down too much either.

Build up the thickness by adding a couple of layers while keeping each layer in a crisscross fashion. Ensure that the layers are thicker on the edges. Once it has dried sufficiently, the mold can be easily demolded by squeezing the tummy a bit or inserting the fingers from the edges.

The best part is that this mold is the belly cast itself! It just has to be finished as desired.


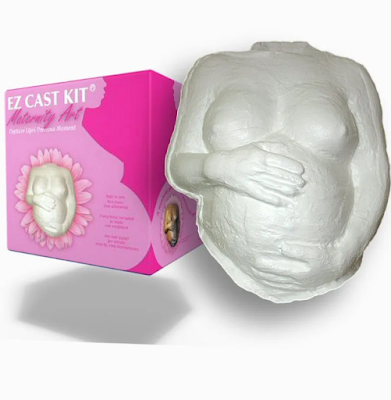
In fact, there are a range of life casting kits, apart from Maternity EZ Cast Kit, like for casting baby's hands and feet, adult hands, faces, torso, breasts and even a full body. They range from beginner to experienced and advanced level; therefore, users can select based on their experience and comfort level.

Mold Making Methods for Silicone Rubber

Silicone rubber is the ideal material for mold making. There are different methods of making silicone molds – from general to inversion and vacuum – and each delivers top quality molds every time.

Silicone rubber is considered the material of choice for making both molds and casts. The rubber is suitable for making molds of all kinds – from reproducing figurines and giftware to making automotive parts, toys and other prototypes - and gives quality results every time. Moreover, it is easily workable, flows well and is non-exothermic in nature. The rubber always cures uniformly, irrespective of the thickness. It will demold easily as well because silicone rubber does not stick to anything except itself.


SkinRite10

Mold making methods


Molds of silicone rubbers can be made using different techniques. The most common are the general molds which easily replicate the surface details of the model in a negative mold. The silicone rubber is mixed with the catalyst and is simply poured over the model (which is affixed inside a mold box). The mold is easy and quick to make while giving efficient results. It does not require any special skills either.

Otherwise, there is the lamination method, wherein the mold making rubber is painted on the model one coat after the other. This creates a skin of even thickness and the mold can be reinforced with a shell mold if needed. These molds will be lightweight and do not use much of the material either.

Some artists prefer the inverted mold method, wherein first a silicone rubber mold is created and resin or gypsum is poured into it to make a replica of the original model. This method is used to create subsequent molds as part of the inversion process. The subsequent molds can be used anytime for making castings of choice. The lost wax method is a popular method of inversion mold making.

Then there are high precision molds which are made created using a vacuum device. The mold is placed inside the vacuum chamber and the casting material – usually resin or other rubbers – is poured before being vacuumed so as to eliminate any possible defects and air bubbles.


BakeSil

Where to buy?


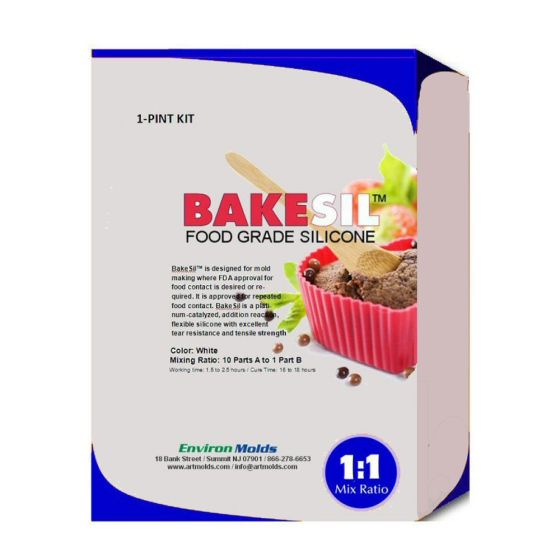
EnvironMolds offers a wide variety of silicone rubbers, both for mold making and casting purposes. First there is the standard silicone mold rubber that lends itself well for general mold making. Then there is the faster acting silicone mold for making quick impressions without using a mold box, called 5-Minute Mold Putty. In addition to this, there are food safe and skin safe silicone mold rubbers – BakeSil is FDA approved as food safe for making food molds and baking containers while LifeRite, can be used on the skin for life casting and duplicating body parts. And what tops the charts is SkinRite10 - a translucent silicone mold rubber which can be tinted and used for special effects and applications to duplicate skin surfaces, making it the ideal material for realistic masks apart from doll reborning.

The Essence That Makes Polyurethane Resins What They Are

 When it comes to the resins, polyurethanes are the most popular and versatile of the lot. Here is a look at the properties and benefits of polyurethane resins which work in their favor for making molds and casts.


Resins are the most commonly used type of casting materials. While synthetic resins are of different types with specific properties and uses, the polyurethane ones turn out to be the most diverse and versatile of the lot.

When it comes to polyurethane resin casting, there are options like fast-setting resins, slow-setting resins, clear resins, opaque resins, foaming resins, semi-flexible resins and more. These are two-part formulas that are usually mixed in equal quantities to form a hard and durable plastic.


These resins can be used to produce an array of products. The liquid is poured into the mold and will capture all the details to form a rigid cast. It should be noted that the resins have low viscosity which works well in the shaping and casting in the most optimum manner. The material also flows well which allows it be mixed and processed with ease.

After casting, the resin sets quickly and can be demolded in a short period itself. There is minimal shrinkage in the process and it displays heat resistance as well. Again, note that the resins lend themselves well for casting very small and thin-walled items which still come with high stability. It sets quickly and can be demolded in about 15 to 20 minutes itself.

The best part is that the resin is receptive to additives like fillers, color pastes and even inhibitors. Water clear casting resins are commonly used for making jewelry like pendants, earrings and bracelets by encapsulating leaves, flowers, buttons, stones, pictures and other keepsake items.

It is noteworthy that the finished polyurethane casts display excellent chemical, oil and grease resistance. Even the abrasion resistance properties are exceptional which ensures that the casts do not tear easily.

However, artists need to keep in mind that polyurethane resins tend to be sensitive to moisture and ultraviolet light. The latter can even cause yellowing, especially in the water clear resins. It also emits a strong odor during the curing process which can become a health hazard.

Special care has to be taken in the pouring as clear resins are prone to bubbles. Casting in a pressure pot will suffice here as the pressure compresses the trapped air till the resins set to a hard plastic, not leaving any space for the bubbles to expand once again.

When it comes to AquaClear Clear Casting Resin, it can be easily sourced from EnvironMolds. This is a storehouse of all types of materials, supplies and equipment for making molds, casts and life casts. For instance, it is not just about the resins alone, the website also provides access to resin pigments, medium and more. Additionally, there are photo luminescent pigments and a complete line of skin-safe body paints as well.

Dental Alginate Metamorphosized for Life Casting

Alginate has come a long way from chance beginnings for dental impressions to body molds for life casting. The alginate has to be modified to suit its new application which makes it more versatile as well.

It literally took a world war for alginate to be used as a dental impression material and, ultimately make its way into the world of life casting!

It was during World War II when agar could no longer be sourced from Japan, that the U.S. Navy first started using alginate for dental impressions. Soon regular dentists also started shifting to this natural seaweed material.

History does not record the name of the first artist who started using the same alginate for making body molds for life casting. But it is very much possible that some dentist was hit with a brainwave that the same gooey material that he/she was using on a patient’s teeth can work for taking impressions from the rest of the body as well. A trial or two may have revealed that the alginate captures excellent forensic details, right down to the fingerprints.


The modifications in alginate


Making a mold of a couple of teeth is a quick and simple job. But can the same be extended to bigger and more complicated parts of the body?For starters. regular alginate will set up too quickly to be workable.

But it is not just about tweaking the set time alone. Even the hardness/softness of the cured alginate has to be ideal to deliver the requisite tear resistance. For instance, alginate that is too soft will obviously tend to tear easily, especially when the structure is too thin. Contrarily, if it sets too hard, the strength will actually make it inflexible. The body mold will not come off easily and is most likely to tear when pulled from tight places. Therefore, the alginate formula has to be manipulated to make it strong, but without becoming too hard!

While it is mostly dental firms that manufacture the modified alginate as an extension of their regular product range, EnvironMolds provides a range of specialized alginate formulas – like MoldGel alginate, LifeMold Silica Free Alginate and Hollywood Impressions SILFREE alginate that have been specially formulated for life casting needs.

For instance, the MoldGel Alginate SloSet features an extended set time of 7 to 8 minutes. Additionally, liquid retarders are also available that can be mixed in the alginate to further slow down the set time. This features good tear strength as well. If needed, fiber can be embedded in this alginate to further enhance the tear strength before reinforcing the body mold with plaster bandages. A better option is to use FiberGel E F/X Grade Alginate that features a fiber matrix which not only adds tear resistance and strength, but also allows for delayed casting times and reduces the shrinkage rate. What more can one ask for?

Do check out the complete range of alginate options and other materials available at https://www.artmolds.com

Using a Release Agent in Mold Making and Casting

Before making a mold or cast, the model or mold has to be prepped for the job. This includes applying a coat of release agent as this will aid in easy demolding. The same goes for body molds as well.

There are many intricate minutiae involved in making a mold or cast. It is not just about the choice of material or technique; the artist also has to consider various other factors and requirements that can affect everything from the details captured in the mold to the quality of the final cast.

One such detail is the use of a release agent. The name is self-explanatory – a release agent keeps the mold from sticking to the model or the cast from adhering to the mold, thus facilitating easy demolding. Household products like petroleum jelly or paraffin wax can serve well as a release agent, however, for best results, it is advisable to use a professional mold release.

Keep in mind that there are certain materials like silicone rubber that do not stick to anything except itself. Therefore, it is commonly perceived that a release agent is not required. However, it is still better to use one as this will significantly increase mold life!

How to use?


Before applying the release agent, first clean the model or mold properly to prevent any kind of unevenness in the mold or cast later on. The model or mold should be sealed if needed and allowed to become completely dry.

Spray the release agent uniformly but sparingly to cover the entire surface (interior or exterior). Alternatively, the release agent can even be applied with a brush. For best results, hold the can at a constant distance from the surface (12” to 18” is recommended) and ensure that the same pressure is applied. Do not go overboard, as too much release agent may cover the details and lead to irregular distortions. This can also end up causing stains or air bubbles.

Allow the release agent to dry for 10 minutes or so before applying/pouring the mold making or casting material. In case an in-mold paint is to be used, it should be applied after the release agent dries. Once cured, the mold or cast can be easily removed by loosening around the edges.


Where to find?


EnvironMolds is the best resource when it comes to everything to do with how to make molds. It provides two great mold release options –

  • ArtLube100 is a silicone-based release agent specifically formulated for use with polyurethane molding systems and KastEZ urethane casting system. It can also be used with other polyurethanes, epoxies, polyester resins and silicone rubbers.
  • IsoKote 1000 (formerly Synlube 1000) is another silicone-based release agent formulated for the release of both low and high temperature cured urethanes from metal and plastic molds. It can also be used with epoxies.

Then there is MoldEZ Hair and Mold Release, a water soluble release agent that prevents alginate from tangling in the hair when making body molds.


The Art of Life Casting Explained

Getting into the nitty-gritties of life casting will show that it is complicated for sure, but doable with some practice and a lot of care. The artist has to always consider that he/she is working on a live model!

Life casting is a specialized art of making a three dimensional copy of the human form with a high level of realism and detail. Highly skilled molding and casting techniques are used to capture the finest of features of the human body; it can be any part from the face, hands and feet to the torso or the entire body.

Going way beyond a painting or photograph, the sculpture will recreate each and every fingerprint, dimple, fold and other lines on the body to imitate the physical presence and essence of the person. Life casts can be made with or without clothing.

How does it go?


The model is first prepped for what lies ahead. The pose is discussed and practiced while keeping comfort and safety in mind. Petroleum jelly or other release agent is applied first to prevent the body mold from snagging in the body hair.

Alginate, which is safe for the skin, is commonly used to make the body cast. It should be mixed with soft water in the specified ratio to form a creamy mixture of a workable consistency. The hand or foot has to be merely dipped into the alginate container and allowed to set. This works quickly and the body part can be slowly wriggled out to leave a negative mold behind.

A more complicated but proficient method is to apply the alginate on the body. It has to be carefully spread and smoothed into all the contours while taking care of the eyes, nose, ears, hair and so on. The artist has to work quickly as the alginate tends to set quickly. It is then reinforced with plaster bandages; this shell mold will enable the alginate to retain its shape.

The mold can be demolded pretty soon, all it takes is working the fingers under the edges and wriggling the body a bit. It can be corrected if needed and will be ready for casting. Plaster or other casting material is poured into the mold and allowed to cure. Just remove it and finish as desired. Some people even insert a wire or hook in the casting material itself and it can be hung on the wall later.

Keep in mind that the casting should be done quickly too, as the alginate will tend to shrink as it loses water on contact with air. Moreover, these are one-off molds and cannot be used for making multiple copies.

Making a body casting involves complex procedures, but the going gets easy and straightforward with time. The life casting artist has to be particularly careful about the model as it is a live person that he/she is working on here! Last but not the least; life casting is immensely satisfying and rewarding…..make the most of it!


Process to Craft Flawless Life Cast


Body casting is a popular type of art in which the human form is replicated in three-dimensional constructions. Full body castings are frequently created by experienced casting artists for theatrical or other aesthetic purposes, such as movie props. These castings are often made with skin-friendly and environmentally friendly mold making materials. Two typical materials used to create the master copy of the subject are alginate and plaster.

Generally, any life casting is completed in three pieces - head, rear and the torso. After separately making each of these parts, they are then seamed with each other through careful and precise techniques. The head is generally the last part to be attached to the cast.

Once removed from the mold, the body casts typically needs elaborate finishing touches.

To give it a semi-gloss, sometimes artists add polyurethane varnish for a pleasant look. Some life casting material kits comes with a specialized form of wax which when polished on the cast gives a marble-like shine. Depending on the need of the casts, the final color or the look can be done.