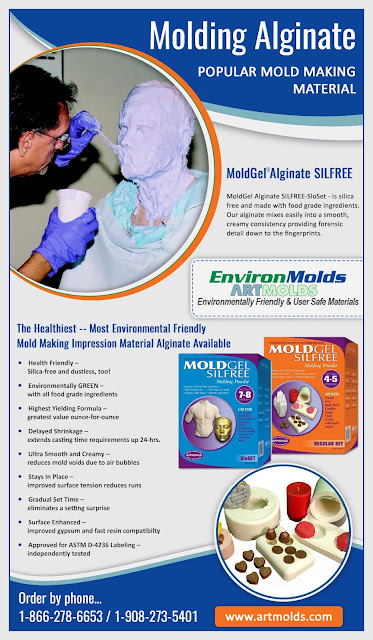
Silica Free Versions in Alginate

MoldGel Alginate SILFREE is considered the healthiest, safest and most environment friendly alginate formula in the market. It is silica free which makes it suitable for use on baby skin too.

Alginate is a simple dental impression material that lends itself well for making body molds. It is a natural material derived from seaweed and considered completely safe for the skin. The powder is mixed with water (in the defined proportions) and applied directly on the body to capture impressions for making life casts.


However, the alginate powder does contain some amount of crystalline silica which is considered a carcinogen. Even though the silica content is on the marginal side, EnvironMolds has developed a special silica free and dust free formula called MoldGel Alginate SILFREE.

This is made with food grade ingredients and is both environment and user friendly. To add to this, it is the only alginate that is fluoride free and lead free as well.

The powder mixes easily to give a smooth, creamy consistency which helps reduce mold voids due to air bubbles. It also yields greater coverage because of the mix ratio of 1 part powder to 7 parts water, (compared to 1:3 ratios for regular formulae). In fact, this has emerged as the highest yielding formula as it gives greatest value ounce-for-ounce.

Apart from the economical factor, the silica free Alginates provide excellent forensic detail down to the fingerprints. The delayed and gradual set time (4 to 5 minutes in MoldGel Alginate Silfree regular formula and 7 to 8 minutes in SloSet) allows a considerably longer window for working with the alginate mix. It further boasts of delayed shrinkage too and the casting time limit is extended up to 24 hours!

Finally, as MoldGel Alginate SILFREE is gentle on the skin and yields a softer set, it is ideal for casting hands and feet of babies and small children.

The formula is available in 1lb, 10lb, 20lb and 50lb packs on the EnvironMolds website, Artmolds.com. Other variants like Hollywood Impressions SILFREE and LifeMold Silica Free Alginate are also available.

Using The Best Latex Casting Rubber

RD 407 Mask Making Latex is considered the best liquid latex casting rubber not just for making masks, but also gloves, props, coating and other uses. It is easy to use but does require some careful handling.

Liquid latex rubber is a popular mold making material because of its tough, durable, tear resistant and economical aspects. The same is also used as a makeup and special effects product to create varying effects for film and theatre.

In addition, there is latex casting rubber variants which are less viscous than the mold making latex rubbers. These are commonly used for making hollow toys, props, puppet heads and masks. In fact, RD-407 Mask Making Latex is considered the industry standard for making latex masks, props, gloves and a skin over polyurethane foams. This is a high quality latex that is favored by professional artists for masks, body parts and other thin skin latex products.

Latex casting rubber is very easy to use when compared to other casting materials. It comes in a ready-to-use liquid form and just has to be poured into the mold. It is swished properly in the mold and allowed to sit for a couple of hours before being poured out again. The latex that remains clinging to the sides of the mold will dry gradually and can be peeled out to become the actual thin skin cast.

Apart from making masks and props, the same RD 407 latex rubber can also be used to coat fabrics for waterproofing and insulating tools. Dipping the model into the latex and allowing the coat to dry before repeating the steps will build up a suitable protective coating over the same. Alternatively, the same latex can also be used to coat foam that has been carved into the desired shape.

A latex cast can be sanded, painted and finished as required. It will be elastic and flexible but still stays durable for years to come. Even the amount of hardness and flexibility of the rubber casting can be manipulated by adding an extender and filler like RubRfil.


Care during use

 
Liquid latex rubber is a simple product that can be used easily. It has a long shelf life and can be used whenever desired.

In case a stored latex rubber turns thick, it can always be thinned by adding some distilled water to get the desired consistency. The ammonia in the latex will also tend to evaporate. In case the ammonia smell is diminished, adding some aqua ammonia from a chemical store will restore it back to normal. However, latex should never be allowed to freeze as this will render it unusable. Special handling is necessary during the freezing months of winter.

In sum, casting latex rubber is a multi-use product that is commonly used to make latex mask but has other useful applications as well. In fact, it can be used to create almost any effect as a cast or directly on the skin as well.

Casting in Single and Two-Part Molds

The casting procedure will vary depending on the technique used for making the mold. Casting a single piece mold is easier than a multi-part one, but the results will definitely be up to the mark.

The simplest process of mold making is to cover the model with an appropriate mold making material and let it set properly. Once cured and demolded, the covering will reveal a negative impression of the model complete with all the grooves, nooks and other details.

Different techniques of making molds – such as block, blanket, glove, poured, slush, etc. – can be used depending on the type of model and choice of materials. A model that is too floppy, has undercuts or does not have a flat bottom will even require the mold to be made in two or parts, called a multi-part mold.

Irrespective of the method and type of mold, once it is ready it is time to make the positive through the casting process. Here, the actual procedure for casting will vary depending on whether it is a single or multi-part mold.

Single mold casting – Casting in a single piece mold is quite easy. All that the artist has to do is mix the casting material of choice and pour it into the mold. The cast will set in some time and can be demolded before allowing it to cure completely. Care will have to be taken about applying a release agent, eliminating air bubbles and the like. However, the process still remains straightforward and the cast will be ready once it is finished and polished properly.

Multi-part mold casting – Making a mold in two or parts is definitely a complicated and time-consuming process. It follows that the casting process will not be simple either.

The process begins with aligning the different parts of the mold based on the keys. Once the mold comes together properly, it should be secured using heavy-duty bands. Backing boards will also be required in case the mold is flexible.

After securing the mold, the casting material can be mixed and poured into the mold through the sprue or air hole. Care is required again to ensure that the mold is full of the casting material and it reaches every indentation and undercut of the mold. Applying a release agent and eliminating air bubbles is obligatory yet again.

The cast is then allowed to set inside before removing the bands and pulling the mold parts apart. The cast can be removed and allowed to cure further. Cleaning, finishing and painting can be done as needed.

In sum, the techniques for casting in single and two part molds may be a bit different, but the final cast will definitely not leave anything wanting as long as the procedure is properly followed.

Once the cast is ready, it can be displayed or used as planned. Even the mold can be used to make multiple casts if it is not torn down when demolding the cast.


Face Cast – Lying Down or Sitting Up?

Making a life cast requires meticulous attention to a range of details. Whether the model is posing in a horizontal or vertical position can also make a world of difference to the face mold and life cast.

Life casting is a beautiful art of replicating the human body in its three-dimensional form. The entire body or any specific parts can be represented in a life cast. While people do commission life casts of their hands, feet, breasts, pregnant belly, torso and so on, the face cast remains quintessentially popular.

Alginate is usually the material of choice for making a body mold. The material is safe for the skin, dries quickly and can capture the fine indentations of the body.

The actual process of making a life cast begins with counseling and prepping the model for the session. The life casting artist will clarify possible discomfort, safety precautions and other details with the model. He or she will secure the model’s hair and apply a fine coat of petroleum jelly so that the alginate does not tangle in the body hair.

It often happens that the model may prefer lying down during the process. The artist too may agree thinking that it will keep the model at ease and allow for easy application without any movement.

However, they should keep in mind that lying down in a prone position will pull the skin down and can cause the face to distort slightly. The change may not be visible to the eye but will show up in the body mold. Moreover, the additional weight of the alginate mix and plaster bandages that are applied subsequently also have to be considered. This can make the face cast look flawed or even disfigured.

Therefore, it is always better to have the model sitting upright for the face cast. The pose also has to be planned and tested carefully. Even holding the face at an angle can make the life cast look deformed.

In sum, life casting is a challenging art that requires careful planning and precision of various parameters.

Artists can source the alginates, plaster and other materials from the EnvironMolds website, https://www.artmolds.com.


Sealing Mold Box Is Essential

Some mold makers skip sealing the mold box thinking that even if the mold making material tends to leak from the edges, they can always clean the mess later. But can you really afford to do so? Find out why….

One of the first steps for making a mold is making a mold box. This is a structure that is used to contain the model. For making a small rubber or resin casting, a cup, bowl or bottle can easily serve as the mold box. However, it is essential that the ‘box’ should be able to contain the entire model. That’s not all – it should also allow sufficient space around and over the edges of the model so that the mold making material can form a thick rim around the model.

Mold makers often use different materials to make the mold box – think cardboard, plastic, acrylic sheets, wood, metal or even lego blocks to form the containment field. Ready-to-use mold boxes are also available in art stores and these can be adjusted to suit the dimensions of the model.


Irrespective of the type of mold box, it is essential to seal and caulk the mold box properly. Else, consider this - leaving a mold box with a leak to cure overnight is likely to result in a half-complete mold in the morning!

So, isn’t it better to create a waterproof seal around the edges of the mold box? Applying glue or clay around the exterior perimeter and up the corners of the box will seal the edges and keep the runniest of mold making materials from leaking out of the mold box. Plasticina clay is considered best for this purpose.

Another important step is to apply a release agent inside the mold box and glue the base of the model to the bottom of the box. This will ensure that the model does not shift while the mold making material is poured into the box. Demolding will be easy as well.

All materials like clays, polyurethanes and rubbers along with supplies can be easily sourced from EnvironMolds at https://www.artmolds.com

Opening The Eyes In A Life Cast

It is customary to make a head cast with closed eyes. But it will look real only when you can ‘open’ the eyes during the casting process. Expert sculpting skills will stand you in good stead here.

Life casting is an artistic process of making a beautiful likeness of a person. The three-dimensional creation surpasses the images produced in photographs and paintings and gives it an incredibly realistic impression, right down to the natural creases, the usual pores and even the real texture of your skin.

Once the body mold is done and the cast is ready, the finished life cast can be mounted on a suitable base. Adding a brass name plate engraved with your name and other details will be the final touch that gives a professional and gallery-like finish to the artwork.

The results look amazing, but getting there is replete with intricate complications. One of the most challenging aspects of making a life cast is getting the eyes right in the body mold.

The life casting artist will obviously apply the skin safe alginate or silicone rubber all over the eyes. The gooey substance is carefully worked over the lids and into the corners of the eye sockets to capture the contours in detail. This will create a life cast head with closed eyes. After all, it is virtually impossible for a model to keep the eyes open during the life casting process!

However, the closed eyes will make the head cast look akin to a death mask. Opening the eyes is what will add ‘life’ and make it look natural.

Experienced life casting artists have persevered to work out effective ways to sculpt the eyes open.


It is after a lot of trial and error that an artist will be able to make accurate incisions to remove the ‘eyes’ from the face mold. Exceptional sculpting skills are required to carve new eyes as if they are open. It involves shaping fully open or half closed eyelids with clay or plaster. The cavities and the lower lids also have to be sculpted and chiseled with infinite care and patience. Painting and other finishing techniques are used to create realistic eyes in the final life cast.

Alternatively, some artists also use prosthetic eyes to give their life cast a realistic effect. They carve out the sockets in the body mold and fit glass or acrylic eyes into the head portrait. This may seem easy at the outset, but it still requires proficient sculpting to fashion the eyelids and shape the corners in the mold.

Ready eye forms are available in art stores that look natural and add a lifelike appearance to the life cast. They should be chosen with care to suit the shape and color of the model’s original eyes. Some artists even prefer to make their own eye forms with resin and add detailing to the same.

Whatever ‘eye-opening’ method you use, do not forget to add brass name plates engraved once the life cast is ready for display.

Making Perfect Casts From Molds

Mold making is deeply entwined with casting. In fact, it is impossible to make a cast without making a negative impression of the model in the form of a mold. Learning both the arts becomes essential.

The casting process always begins with how to make a mold. The artist can choose the mold making material and the technique depending on the nature of the model, the preferred casting material, personal dexterity and so on. While the mold can be made using clay, wax, plaster, resin or rubber, the method can vary from simple block molds to more complicated blanket molds using the brushed, poured or glove mold making system.

Here, the artist also has to decide whether they will be making a mold in its entirety at one go or in parts. The latter is quite an intricate and time-consuming process. But it becomes essential if the model has deep indentations, protrusions or undercuts. This calls for making keys and sprue holes in the parts of the mold as well.

Once the mold parts are ready, the artist can move to the casting process. First timers often wonder if the cast will also be made in parts and need to be fused together later.

This is not actually the case in reality. In fact, making a cast in multi-part molds is similar to casting in a single piece mold save for a few extra steps.

The casting process

The mold parts are thoroughly cleaned and dried before coating with a release agent. Then the parts will be lined up using the keys so that they align properly. Mold straps or heavy duty rubber bands are needed to bind the mold parts together and keep the casting material from leaking out. In case the mold is flexible, backing boards are placed on either end of the mold to keep the mold from bending or collapsing on itself. The bands go over the boards and hold the entire arrangement in place.

Now all that is required is pouring the casting material into the mold through the sprues. This should be done slowly to avoid air bubbles. The mold is tapped a few times to allow the plaster, rubber or resin to fill the indentations and settle everywhere properly. It is advisable to continue pouring till a bit of the material starts flowing out from the holes.

The mold should be allowed to sit for a couple of hours or even overnight to ensure proper curing. Once set, the bands can be removed and the mold parts separated with a gentle hand. This will reveal the cast in its entirety!

The cast is then removed and finished with sandpaper and paints as needed.

Therefore, newbies need to know how to make molds and casts of different types before attempting any project. Perfection comes with practice and they can learn the tricks through trial and error. Very soon they will also be able to create flawless casts from impeccable molds.