Best Molds to Use in Resin Casting Tutorials for Beginners


Resin casting has become a favorite hobby for many crafters and DIY enthusiasts. Whether creating jewelry, coasters, figurines, or home décor, understanding the best molds to use can make a big difference in your final piece. This guide on resincasting tutorials for beginners is designed to help you choose the most suitable molds and understand how they contribute to quality outcomes. From silicone to plastic and HDPE, we’ll explore which types offer the best results and why they matter.

Understanding Resin Casting Molds

Resin casting is the process of pouring a liquid resin into a mold where it hardens into a specific shape. The mold is essential because it determines the design, surface finish, and release ease of the final product. When choosing molds, beginners must consider durability, flexibility, surface texture, and ease of cleaning.

The most commonly used mold types are silicone molds, plastic molds, and HDPE (High-Density Polyethylene) molds. Each has advantages and ideal uses in resin casting tutorials for beginners.


Why Silicone Molds Are Best for Beginners

Silicone molds are often recommended in resin casting tutorials for beginners due to their non-stick properties, flexibility, and detailed replication. They come in a wide variety of shapes and sizes, making them perfect for small crafts like pendants, earrings, and mini sculptures.

  • Flexibility: Silicone molds bend easily, making demolding a hassle-free process.
  • Non-stick surface: Resin rarely adheres to silicone, so you get a smooth finish.
  • Detail-friendly: Intricate designs are easily captured in silicone molds.

Silicone molds are reusable and easy to clean, making them ideal for beginners who plan on experimenting with different projects.


Plastic Molds: Affordable but Less Flexible

Plastic molds are also popular in many resin casting tutorials for beginners. They are inexpensive and accessible, often found in craft stores or online marketplaces. However, plastic molds are rigid, which can make demolding tricky. Improper removal can lead to cracks in the mold or damage to the cast.

They are best used for basic shapes and simple designs like coasters, trays, or paperweights. While they lack the intricate detailing capabilities of silicone molds, plastic molds offer a budget-friendly option for newcomers wanting to practice with minimal investment.

HDPE Molds: Ideal for Larger Castings

HDPE molds are not as widely mentioned in resin casting tutorials for beginners, but they are excellent for more advanced or larger projects. These molds are made from a dense plastic that resin does not bond to, allowing easy release once the resin has cured.

HDPE molds are highly durable and resistant to warping, making them suitable for casting thick layers or large quantities of resin. These molds are ideal for furniture inlays, large art panels, and functional décor pieces. However, they may require more technical handling and are better suited once a beginner gains confidence.


Choosing the Right Mold for Your Project

Selecting the appropriate mold depends on the project’s size, complexity, and purpose. For example:

  • Jewelry and small crafts: Opt for flexible silicone molds with detailed cavities.
  • Flat items like coasters: Plastic molds offer a cost-effective option.
  • Larger castings: HDPE molds provide structural integrity and long-term usage.

Each type of mold has its purpose, and combining them in your toolkit can provide versatility in your resin casting journey.

Factors to Consider Before Buying Resin Molds

When shopping for molds, consider the following features to ensure a smooth crafting experience:

  • Durability: How many times can you reuse the mold before it degrades?
  • Heat resistance: Some resins generate heat during curing, so your mold must withstand the temperature.
  • Clarity of design: Transparent molds allow better visibility during pouring and help reduce air bubbles.
  • Surface smoothness: A polished interior ensures a glossy final finish.

These details are often highlighted in professional resin casting tutorials for beginners, making them essential considerations for high-quality output.

Maintenance and Care for Resin Molds

Proper care extends the life of your molds. Here’s how to maintain them:

  • Clean after each use: Gently wash with warm water and mild soap.
  • Avoid harsh scrubbing: Use soft cloths to prevent scratches.
  • Store properly: Keep molds flat in a cool, dry area to prevent warping.
  • Use mold release spray: This prevents sticking and extends usability, especially for plastic or HDPE molds.

With good maintenance, your molds can last through multiple projects and retain their quality.

Where to Buy Quality Resin Molds

For reliable, high-performance molds, it’s essential to purchase from trusted brands. ArtMolds offers a wide selection of molds tailored for every type of casting. Whether you're creating custom jewelry or large-scale art pieces, their collection provides beginner-friendly solutions without compromising on professional quality.

Conclusion

Understanding the best molds to use is the first step toward mastering resin casting tutorials for beginners. Silicone molds offer flexibility and ease, plastic molds are cost-effective, and HDPE molds provide durability for large projects. By choosing the right mold type, beginners can avoid common mistakes, produce cleaner casts, and enjoy a smoother crafting experience.

Ready to explore top-quality molds for your resin casting journey? Visit ArtMolds.com – Where Creativity Takes Shape.

3D Printers for Molds: What You Need to Know About 3D Printing Molds for Casting

In the world of DIY craftsmanship, art, and industrial prototyping, 3D printing molds for casting has unlocked a new dimension of creativity and customization. Whether you're a hobbyist making soap or candles, or a small business producing custom parts, 3D printed molds offer flexibility, cost-efficiency, and precision.

But before diving in, it’s essential to know which type of 3D printer is best suited for your casting needs. In this blog, we’ll explore the best 3D printers for mold-making, what to consider before choosing one, and tips to make your mold-making journey a success.


Why 3D Printing Molds for Casting?

Traditionally, making molds involves carving, CNC machining, or silicone molding from an original object. 3D printing streamlines this by allowing you to design a digital model and directly print the mold, cutting down time and cost dramatically. With this method, you can produce custom molds in-house for materials like:

  • Silicone

  • Resin

  • Concrete

  • Plaster

  • Wax

  • Low-temperature metals (via lost-PLA casting)


Types of 3D Printers for Mold Making

Image Source :- ic3dprinters.com

1. FDM (Fused Deposition Modeling) Printers

Best for: Large molds, basic shapes, and low-cost projects.

Materials Used: PLA, PETG, ABS

Pros:

  • Affordable and beginner-friendly

  • Larger build volume

  • Great for concrete or plaster molds

Cons:

  • Visible layer lines (may require sanding or sealing)

  • Not ideal for fine detail

Popular FDM Printers:

  • Creality Ender 3

  • Prusa i3 MK4

  • Anycubic Kobra Neo


Image Source :- formlabs.com


2. SLA/DLP Resin Printers

Best for: High-detail molds and complex designs (e.g., jewelry, small silicone molds)

Materials Used: UV-sensitive resins

Pros:

  • Smooth, high-resolution finish

  • Perfect for intricate casting needs

Cons:

  • Smaller build volume

  • Resin handling requires care and post-processing

Popular Resin Printers:

  • Elegoo Mars 4 Ultra

  • Anycubic Photon Mono X

  • Prusa SL1S


Image Source :- magigoo.com


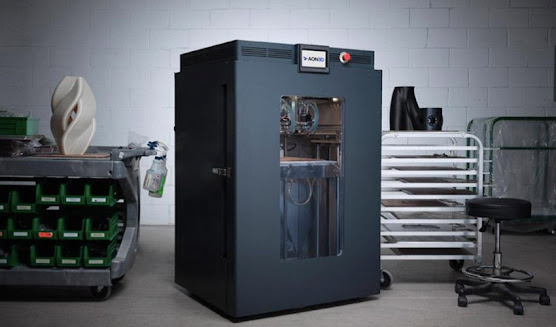
3. High-Temperature FDM Printers

Best for: Molds exposed to heat or pressure (e.g., vulcanized rubber molds, metal casting)

Materials Used: Nylon, Polycarbonate, Carbon-fiber-reinforced filaments

Pros:

  • Durable, heat-resistant molds

  • Suitable for industrial applications

Cons:

  • Higher price point

  • Requires enclosed and controlled environment


Tips for Successful 3D Printed Molds

  1. Use a Release Agent: Prevents the cast from sticking to the mold surface.

  2. Post-Process FDM Prints: Sand, seal, or coat with epoxy (like XTC-3D) for a smoother finish.

  3. Design with Draft Angles: Makes mold release easier.

  4. Split Complex Molds into Parts: Easier to print and assemble.


Applications of 3D Printed Molds

  • Candle and soap making

  • Prototyping plastic parts

  • Chocolate and baking molds (food-safe filament only)

  • Concrete garden decor molds

  • Jewelry and small metal parts (lost PLA/resin method)


Conclusion

If you're thinking about creating custom molds, 3D printing molds for casting is a game-changer. From affordable FDM printers to high-resolution resin machines, there’s a solution for every creator. By choosing the right printer and material, you can unlock endless possibilities—from artistic sculptures to functional prototypes.

Whether you're casting resin, silicone, or concrete, 3D printed molds put the power of manufacturing right on your desktop.


Things to Make with Silicone Molds

Silicone molds are a game-changer for artists, bakers, crafters, and DIY lovers. Their flexibility, durability, and ease of use make them perfect for creating endless projects. Whether you're new to silicone molding or looking for fresh ideas, here’s a look at some exciting things you can make using silicone molds.

1. Candles

Silicone molds are fantastic for candle making because they can handle the heat of melted wax and release the finished product easily. From classic pillar candles to intricate shapes like flowers or geometric designs, the possibilities are endless.


2. Soaps

Handmade soaps look even more charming when crafted in silicone molds. You can create themed soaps for holidays, special occasions, or simply add a touch of luxury to your bathroom with custom designs.

3. Chocolates and Candies

Food-grade silicone molds are ideal for chocolate and candy making. Pour melted chocolate or candy mixture into cute molds like hearts, stars, or even mini animals for fun and delicious treats.

4. Resin Art Pieces

Epoxy resin pairs beautifully with silicone molds to create coasters, jewelry, decorative trays, paperweights, and keychains. The mold’s flexibility ensures that even intricate designs come out clean and bubble-free.

5. Bath Bombs

Custom bath bombs can be made easily with silicone molds. Choose fun shapes, add vibrant colors, essential oils, and watch your creations fizz away in the tub.


6. Plaster and Cement Crafts

For more industrial DIY projects, you can use silicone molds to shape plaster, cement, or concrete into items like plant pots, garden statues, or wall art.


7. Crayons and Wax Melts

Recycle broken crayons into fun new shapes or make homemade wax melts for your scent warmers using silicone molds.

 If you're feeling creative and want to customize your projects even further, you can make your own silicone molds at home! Check out this detailed How to Make a Silicone Mold at Home (Step-by-Step Guide) to get started with mold making yourself.

With just a little imagination and the right mold, the things you can create are truly endless! What would you like to try making first?


AI vs Traditional Mold Design: A Side-by-Side Comparison


In the ever-evolving world of mold making, the fusion of art and technology is creating exciting new opportunities. For decades, traditional mold design methods have been the foundation of sculpture, casting, and manufacturing. But now, with the emergence of AI-generated mold designs, artists and professionals are witnessing a seismic shift in how molds are conceptualized, created, and perfected.

Let’s explore how traditional and AI-driven approaches to mold design stack up against each other—and why the future may already be here.

      1. Design Process

Traditional Mold Design

  • Relies heavily on hand sketches, clay models, and manual sculpting.

  • Time-consuming and dependent on the skill level of the artist.

  • Involves several rounds of trial and error before achieving the desired result.

AI-Generated Mold Designs

  • Starts with digital input—2D sketches, photos, or even verbal prompts.

  • AI analyzes and optimizes the shape, symmetry, and fit automatically.

  • Produces ready-to-use 3D designs in minutes, significantly reducing production time.


    2. Accuracy and Precision

    Traditional Mold Design

  • Variability in manual craftsmanship can lead to inconsistencies.

  • Measurement errors and asymmetries are common.

AI-Generated Mold Designs

  • Delivers precision down to fractions of a millimeter.

  • Automatically corrects structural flaws and aligns surfaces for a perfect cast every time.


    3. Time and Efficiency

    Traditional

  • Each stage—from concept to final mold—can take days or even weeks.

  • Reworking errors adds further delay.

AI-Based

  • Design and revisions are almost instant.

  • Ideal for high-volume or deadline-sensitive projects.


    4. Creativity and Customization

    Traditional

  • Offers a deeply personal, handcrafted touch.

  • Creativity is limited by manual skills and available materials.

AI

  • Enhances creativity by generating variations you may not have considered.

  • Easily customizes designs based on size, material, texture, or functional use.


    5. Cost Considerations

    Traditional

  • High labor costs and materials used during trial-and-error can be expensive.

  • May require specialized sculptors or mold experts.

AI

  • Reduces labor time and material waste.

  • Offers a scalable and cost-effective solution, especially for small studios or independent artists.


    6. Learning Curve

    Traditional

  • Requires years of practice to master mold making.

  • Mistakes are part of the learning process.

AI

  • Easy-to-use platforms with intuitive interfaces.

  • Beginner artists can achieve professional-quality results with little prior experience.


    The Verdict: Tradition Meets Innovation

    Traditional mold design is a beautiful art form rooted in craftsmanship, patience, and personal expression. But in today’s fast-paced creative industries, AI-generated mold designs offer speed, precision, and innovation that traditional methods alone can't match.

    The good news? You don’t have to choose one over the other.

    Artists and makers worldwide are now blending both techniques—letting AI handle the heavy lifting while they focus on what they do best: bringing imagination to life.


    👉 Want to see how AI is already transforming the casting world?
    Check out our in-depth blog:
    How AI-Generated Mold Designs Are Transforming the Art of Casting


Step-by-Step: Making a Resin Cast Using a 3D Printed Mold


Ready to bring your creative ideas to life? Let’s walk through how to make a professional-looking resin cast using a custom 3D printed mold—perfect for artists, crafters, and makers who want to level up their casting game.

Why Use a 3D Printed Mold for Resin Casting?

Traditional mold-making has its perks, but 3D printing is changing the game. Whether you're replicating an intricate design, personalizing a project, or just tired of expensive silicone prototypes, 3D printed molds offer a more precise and cost-effective solution.

In fact, we recently broke down how 3D printed molds are revolutionizing the world of art and manufacturing in our blog:
👉 3D Printing Molds for Casting: A Game-Changer in Manufacturing and Art

Now, let’s get hands-on.

What You’ll Need

Tools & Materials

  • A 3D printed mold (PLA, ABS, or PETG recommended)

  • Resin (epoxy or polyurethane)

  • Mold release spray (optional but helpful)

  • Mixing cups and stirrers

  • Gloves & safety gear

  • Heat gun or torch (to remove bubbles)

  • Paints, pigments, or glitter (optional for design)

Step-by-Step Instructions

Step 1: Prep Your 3D Printed Mold

If your mold is freshly printed, you’ll want to clean it thoroughly. Sand any rough edges and ensure the interior surface is smooth—this helps with resin flow and final finish.

Pro Tip: Apply a mold release agent if your mold isn’t coated or sealed. It helps extend the life of your mold and makes demolding a breeze.

Step 2: Mix the Resin

Follow the manufacturer’s instructions for mixing your resin and hardener. Stir slowly to minimize air bubbles.

Add pigments, dyes, or other artistic additives now if you're going for a customized look.

Step 3: Pour the Resin

Slowly pour the mixed resin into your 3D printed mold. Do it gradually from one corner to help air escape and avoid bubbles.

Tap the mold gently on a table to bring bubbles to the surface.

Step 4: De-Bubble and Let It Cure

Use a heat gun or torch briefly over the surface to pop any remaining bubbles.

Let the resin cure as per the manufacturer’s time (usually 24–48 hours). Keep the mold in a dust-free, level space during this time.

Step 5: Demold and Finish

Once the resin is fully cured, gently remove it from the mold.

If needed, you can sand, polish, or paint the finished cast for added flair.


Helpful Tips for Better Results

  • Use high-resolution settings when printing the mold for detailed designs.

  • Experiment with flexible resins for easier demolding.

  • Want a glossy finish? Coat the inside of your mold with a clear sealant before casting.

Where to Learn More

3D printed molds are just the tip of the iceberg. They’re reshaping how we approach casting—blending digital design with hands-on creation.

Want to dive deeper into the tech, materials, and methods behind this trend?
👉 Check out our full blog:
3D Printing Molds for Casting: A Game-Changer in Manufacturing and Art


Create Without Limits

With 3D printing and resin casting in your toolkit, you’re only limited by your imagination. Whether you're creating custom jewelry, DIY home decor, or artistic replicas—this method unlocks a new world of precision and personalization.

Let’s mold the future—one cast at a time. 😉

Latex vs. Silicone: Which is Best for Mask Making?


Choosing the right material is key when it comes to professional or hobby mask making. The debate of latex vs. silicone for mask making is central to achieving desired results in durability, realism, comfort, and budget. Whether you're creating Halloween masks, theatrical props, or collectible pieces, the material you select impacts both the production process and the final quality. In this blog, we will explore the strengths and limitations of both materials and help you determine the best material for masks based on your specific needs.

Understanding the Fundamentals of Latex Mask Making

Latex mask making has been a traditional method for decades, favored by many professionals for its cost-effectiveness and ease of use. Natural rubber latex is flexible, lightweight, and dries relatively quickly. It’s an ideal material for masks that need to be worn for extended periods, thanks to its breathable structure and comfort.

Advantages of Latex

Latex offers excellent flexibility and stretches well without tearing. This makes it suitable for masks requiring frequent wear and movement. Its affordability also makes it a top choice for large-scale productions or seasonal creations like Halloween masks. Latex captures surface details well, which helps in sculpting expressive and exaggerated facial features.

Limitations of Latex

However, latex does have its drawbacks. It degrades over time, especially when exposed to sunlight and humidity. Additionally, some individuals may have allergic reactions to latex, making it unsuitable for certain wearers. The finish of latex is typically less realistic compared to silicone, which may be a concern for professionals looking for hyper-realistic results.

Exploring the Versatility of Silicone Mask Making

On the other hand, silicone mask making has gained traction for producing hyper-realistic and long-lasting results. Silicone offers a skin-like texture and higher tear resistance, making it a preferred option for film, television, and collectors.

Benefits of Silicone

Silicone boasts impressive durability and lifelike appearance. It doesn’t degrade as quickly as latex and is generally hypoallergenic. Silicone masks conform closely to facial movements, making them perfect for animatronics or masks designed to mimic human expressions. Furthermore, silicone maintains its elasticity and appearance over time, even with repeated use.

Challenges of Silicone

While silicone has many benefits, it also comes at a higher cost. The material itself is more expensive, and the process requires more advanced mask making supplies and expertise. Silicone also tends to be heavier than latex, which might affect comfort during extended wear.

Best Material for Masks: Comparing Use Cases

When choosing the best material for masks, consider the purpose of the mask, budget constraints, and your experience level.

  • For hobbyists or seasonal users, latex is a more accessible option. It's easier to work with and more forgiving for beginners.
  • For professionals or special effects artists, silicone offers unmatched realism and durability, justifying the higher investment.

In essence, latex vs. silicone for mask making should be decided based on how the mask will be used, how often it will be worn, and what visual outcome you aim to achieve.

Mask Making Supplies: What You Need to Get Started

Whether you choose latex or silicone, having the right mask making supplies is essential. For latex, you’ll need a mold, sculpting tools, release agents, and painting materials. Silicone mask making involves additional materials like silicone pigments, thixotropic agents, platinum-cure silicone, and specialized release agents.

Investing in high-quality supplies ensures a smoother production process and better results. You’ll also want proper safety equipment, including gloves and ventilation, especially when working with chemicals.

Durability and Storage: Long-Term Considerations

Both materials have different storage and maintenance needs:

  • Latex masks should be stored away from direct sunlight and moisture. Use talcum powder to keep them from sticking together.
  • Silicone masks should be stored flat or on a mannequin head to maintain their shape. Clean them using mild soap and water to ensure longevity.

Understanding how to maintain your masks post-production will keep them looking and performing their best over time.

Customization and Finish Quality

In terms of finishing, silicone outperforms latex for hyper-realistic looks. It can be tinted during mixing and painted with silicone pigments to blend seamlessly. Latex masks usually require painting after molding and can be more prone to wear and flaking.

That said, latex offers better paint adhesion for vibrant and theatrical looks, making it ideal for fantasy or exaggerated characters. Both materials can be customized, but the skill level required for silicone is significantly higher.

Conclusion: Make the Right Choice for Your Masking Needs

When deciding between latex vs. silicone for mask making, the choice ultimately comes down to your project’s demands. For affordability, ease, and flexibility, latex mask making is a reliable option. For realism, durability, and professional appeal, silicone mask making is the superior choice.

No matter which route you choose, ArtMolds provides premium-grade mask making supplies to support your creative process. From molding compounds to pigments and release agents, we have everything you need to bring your vision to life.

Create lifelike masks with professional-grade materials at ArtMolds


FAQs About Latex vs. Silicone for Mask Making

  1. Which material is more beginner-friendly for mask making?

Latex is generally more beginner-friendly due to its affordability, ease of use, and fewer technical requirements compared to silicone.

  1. Are silicone masks more durable than latex masks?

Yes, silicone masks are more durable. They resist tears better, don’t degrade easily, and maintain realism longer than latex.

  1. Can I use the same mold for both latex and silicone masks?

Not always. Latex shrinks as it dries and works best in porous molds, while silicone requires non-porous molds and specific release agents.

  1. Which material is better for realistic human masks?

Silicone is better for creating realistic human masks due to its skin-like texture, translucency, and facial movement compatibility.

  1. Is latex safe for all skin types?

No. Latex can cause allergic reactions in some individuals. Always test for sensitivity or use hypoallergenic alternatives like silicone.

  1. Where can I buy high-quality supplies for both latex and silicone mask making?

You can find premium mask making supplies for both materials at ArtMolds, including tools, compounds, pigments, and mold-making kits.