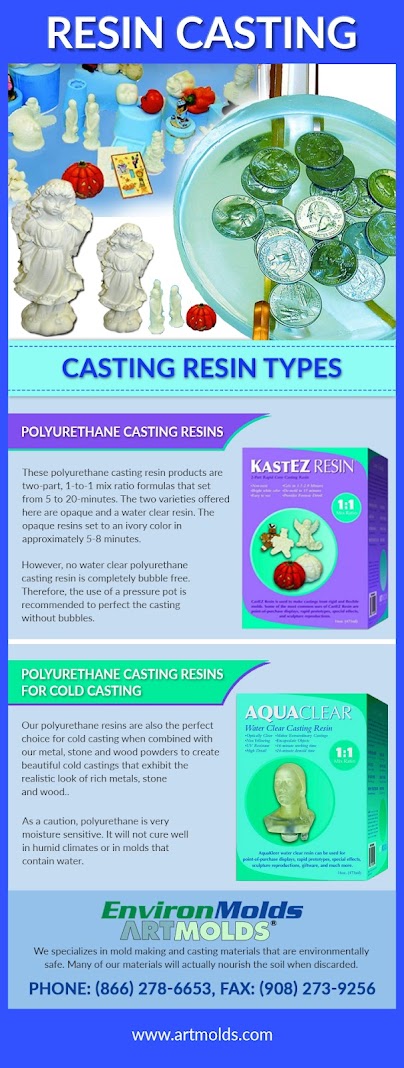
Playing with Temperatures for Better Resin Casts

The temperature of the resin as well as the room should be on the warmer side to ensure that the resin castings cure properly and are free of bubbles. Following are some tips on how to get the temperature right.

Resins come as a two part system – the resin and hardener (or catalyst) have to be mixed together in the specified ratio to make it workable. Here, it is not only about how the two parts are mixed, but also the temperature at which they are used.

Indeed, the temperature of the resin mix as well as the room will determine the quality of the resin casting!


Manipulating the temperature


Resin cures best in warm and dry environments. In case the resin is too cold, it will become thick and may not mix properly. Moreover, the mixing procedure will tend to trap air which will show up as pesky air bubbles in the cast. The resin also fails to cure properly in a cool room and will turn out soft, bendy or with cloudy streaks.

On the other hand, when the resin, hardener and the surroundings are warm enough, they will support the chemical reaction that is essential for the curing to take place.

So, if the resin and hardener are not warm enough, they need to be heated prior to use. The trick here is to place the bottles in warm water for around 10 minutes before mixing. Do not use too hot or boiling water as it will accelerate the curing, thus shortening the pot time. The resin may start curing even before it has been cast!

Another point to note is that the bottles should be dried properly after removing from the water as any droplets of water that fall into the mix can again affect the curing.

In a similar vein, the temperature of the art studio should be maintained around 70℉ to 75℉. If the space is cooler, it is advisable to turn up the heat in the room and close the door prior to starting the casting process. This will even dry up the room a bit. However, ensure that the temperature stays stable as any drop in the mercury can again delay the curing time of the resin.

Some artists even go as far as warming up the mold with a heat tool to ensure a perfect casting! Another option is to use a ‘hot box’ to keep the air around the curing resin warmer than the temperature of the room. Then again, do not overdo the heat either as the resin will cure too quickly in hot surroundings.

EnvironMolds is a one-stop shop for everything to do with mold making, casting and life casting. It offers top quality materials, supplies and tools including all types of resins and polyurethanes for making exquisite casts. The range covers jewelry resins, clear casting resins and even a special formula that can increase the size of the casting by 160%.

Standard Procedures for Making a Silicone Mold

With silicone being a popular and useful mold making material that delivers variety of benefits, artists should be aware of the basics when working with this rubber. Following are some tips on the same.

There are varied options of materials when it comes to making molds. While any malleable material like clay, wax, alginate or resin can be used to create a negative of the master model, rubbers have emerged as the material of choice, especially for professional mold makers. Then again, while there is a choice of polyurethane, latex and thermoset mold rubbers, silicone is preferred for many a reason.

To start with, mold making silicone is easy to use. The material has sufficient working time and cures fairly quickly to deliver durable, tear resistant and heat resistant molds. In fact, the molds will last for years and can be used to make any number of castings.The molds do not shrink much either. A variety of materials – like wax, plaster, gypsum, resins and even low-temperature melt metal alloys – can be cast in a silicone mold. Demolding is also easy as silicone does not stick to anything except itself.

Basic Preparation


Silicone rubber can be used to make molds of anything from figurines, statues, architectural pieces and picture frames to soaps, candles, toys, jewelry and more. The applications also include conventional prototype tooling and stereolithography.

The silicone has to be mixed with the catalyst in the specified ratio prior to use. Both the base and catalyst should first be stirred in their own containers before weighing the required amount of silicone base into a clean mixing container. A useful tip is to tilt the container and roll the material all the way around the sidewall, leaving about two inches from the top. This may sound unnecessary at first, but the coating will work to keep the catalyst from getting absorbed into the container, thus giving a better mix.

After this, the required amount of catalyst can be weighed into the container. Mix the two together by stirring with a stiff, flat-ended metal spatula until a uniform color is obtained. It is better to keep scraping the container walls and bottom to insure a thorough mix.

While artists usually vacuum degas the silicone rubber mix, it is generally not needed for most applications as a uniform flow into the mold box is enough to minimize entrapping of air. In case it is being deaired, the mixing container should be filled only to one-third of its depth to allow sufficient room for expansion during the deaeration.

Additionally, it is noted that low temperature and humidity increases both the work and pot life of silicone rubbers. Some artists even opt to refrigerate the base material before using it in hot environments.

Finally, the catalyst container should be closed tightly after use as exposure to air for an extended period can cause a film or crust to form on the catalyst and this hydrolyzed material will lead to improper curing.

MoldRite 25 Silicone is a popular material for general silicone mold making. The quality of impressions captured by these silicone molds is exceptionally outstanding.

Effect of Temperature on Mold Making and Casting

Temperature can play havoc with the curing of molds and casts by delaying/accelerating the process or not allowing the material to cure at all. Knowledge of the properties will ensure better results.

It is not just about the technique or dexterity of the artist; the quality of the mold or cast is affected by many other characteristics as well. Temperature plays a starring role here – ranging from the temperature and humidity of the surroundings to even the warmth/coldness of the material and model/mold.

This is why it is always recommended that all rubber and resin compounds should be stored at room temperature (72°F/23°C). For instance, if a material is stored at elevated temperatures, like in a hot garage or in direct sunlight, both the shelf life and pot time will get reduced drastically. In contrast, if latex rubber freezes, it becomes unusable and has to be thrown away. Other frozen materials can still be used after they are brought back to room temperature.
 
Let us take a look at how the temperature factors can affect the making of molds and casts:

Cold – A cold environment will usually prolong both the working time and cure time of most materials like epoxy resins, urethane rubbers and platinum cure silicones. The evaporation process of latex rubber also gets delayed in colder temperatures. In case the environment is too cold, some of these materials may even fail to cure at all. However, tin-cured silicones are not as dramatically affected by colder temperatures.

Heat – The opposite is also true as higher temperatures are known to accelerate the cure time and most materials tend to cure much more quickly when it is hot. In fact, many artists deliberately apply heat to hasten the curing process. However, tin-cured silicone rubbers are again an exception as they are not as affected by heat and cannot be ‘heat cured’.

Humidity – Rubbers are best used in a low humidity environment. Higher humidity tends to accelerate the curing in tin-cured silicone rubbers while it has the opposite effect of slowing the evaporation and curing process in latex rubbers. Making molds or casts of urethane rubbers, plastics or foams in humid environments can cause bubbles or foaming in the material. However, platinum-cured silicones and epoxy materials are not affected by humidity.

In addition to this, if the model that is being used to make the mold happens to be too cold, the curing of the mold will take unnecessarily longer to cure and vice versa. Therefore, the model/mold should be brought to room temperature prior to use. When making a mold of a frozen model, it will start condensing once the mold material is applied which will in turn delay the curing. This is why it is better to use accelerated silicones as they will not be affected by the moisture.

Finally, good quality liquid latex rubber, silicone or epoxy materials can be easily sourced from EnvironMolds at https://www.artmolds.com/ at the most reasonable prices.

Making Body Molds with Plaster Bandages

Who says plaster bandages can only be used to make a mother mold? The plaster infused gauze can also be applied directly on some parts of the body to make form molds that are later used for life casting.

Plaster bandages are normally used to make a shell mold to reinforce the flexible alginate or silicone body molds. The plaster in the bandages sets to form a rigid structure that encases the flexible mold and helps it retain its shape.

However, the plaster bandages can directly be applied on the skin to make form molds as well. This is used on areas like the stomach, back, thighs and arms which do not have much contours or undercuts. The bandages are most common for making pregnancy molds of the abdomen to capture the shape of an expecting mother for posterity.


Following is a look at what goes into making a body mold with plaster bandages:

  • The model has to be prepped for the session – the artist should inform him or her about the process, like what to expect and how much time it will take. Discuss the pose and ensure that the model can stay in the position for half an hour or so. Props or support may be required.
  • Prepare the area for the session by lining the floor with a waterproof covering as the dried plaster can prove difficult to remove. The artist should also wear a protective apron or old clothing that can be discarded later.
  • An appropriate mold release – like petroleum jelly or olive oil – should be applied on the body as this will make it easy to remove the mold without pulling on the body hair.
  • The bandages have to be rolled out and wet before applying. Here it is better to use warm water as the wet bandage can chill the skin and become uncomfortable for the model.
  • Lay the strips on the body one at a time starting from the top and moving towards the bottom. Make sure to overlap them to form a strong mold. It is better to keep changing the direction of the bandages when building the layers and make them thicker at the edges. This will serve as a good grip when it comes to demolding.
  • Work out the air bubbles when applying the bandages. However, do not press down too hard as this will form dents and can even deform the mold.
  • Once done, let the mold set and dry before demolding. Carefully run a finger under the edges to break the seal from the skin. The mold can then be lifted off easily from the body.
  • Place it on a soft surface with the hollow side down and let it cure properly. It can then be varnished for some extra protection.

Plaster gauze bandages and other materials and supplies needed for making a life cast can be easily sourced at EnvironMolds. The art supplier manufactures and stocks top quality products and tools and is more than willing to assist with tips and instructions as well.


How to Paint on Silicone Rubber?

Silicone molds and casts always throw up the problem of proper finishing as regular paints cannot be used on this rubber surface. Specially-formulated silicone paints are the best solution.

Silicone rubber proves to be a wonderful material for making both molds and casts. It is easy to use, captures details well and cures quickly too. The best part is that as silicone does not stick to anything, it is easy to demold as well, even without using a release agent.

However, this very property becomes self-defeating when it comes to painting a silicone surface. Regular oil and acrylic paints fail to adhere properly to silicone molds and casts; they will start peeling and cracking soon. This proves to be very frustrating for artists; some even resort to roughing the silicone surface so that the paint can stick on it.

Bringing an answer to the fore


There is silicone paint that has been specially formulated to work on silicone surfaces. Available in a dye form, it should be mixed with a suitable silicone paint medium – just like oil paints are mixed with linseed oil for thinning. This medium is actually a silicone catalyst which works to transform the paint so that it can permanently bond with the silicone surface that has to be painted. As the paint is also flexible, it will easily stretch and bend along with the rubber without causing any cracks or breaks. In fact, the paint can even work to protect and preserve the surface from regular wear and tear.

Silicone paint is usually used extrinsically to paint the silicone surface after it has set. The dried surface is cleaned with acetone before painting by hand. Alternatively, the color can be airbrushed on silicone (do clean the airbrush immediately to prevent clogging). For intrinsic coloring, a few drops of the pigment can be added to the silicone base before adding the catalyst.

However, bear in mind that silicone pigments can be added to tin-based silicone rubbers only. If mixed with silicone that has a platinum catalyst, it can interfere with the setting of the rubber.
 

EnvironMolds offers top quality silicone pigments in a broad range of color options – from black and white to red, blue, yellow, green, orange, purple and more. There is also the 'Quinn Blush' shade which is used by renown doll rebirthing artist, Terry Quinn to add the lovely skin blush to her silicone dolls.

The best part is that this silicone paint can be used on both tin-based and platinum-based silicone rubber surfaces as they have been formulated to adhere to both types of surfaces. Medium for making the paint is also available.

Therefore, artists can easily paint their silicone casts in the desired colors to get the effect they wish. They are especially favored by special effects and prosthetic artisans, doll makers, etc. to give the painted-on color effects to their silicone rubber creations. However, they can be used on regular silicone molds and casts too.

Tips for Working with Plaster for Making Castings

Fine art casting plaster is the material of choice for making casts. This is high-definition and yet easy to use as long as the proper mixing and pouring directions are followed. Find some more tricks here.

Plaster is considered the most common medium for making casts. It creates a rigid form with a lovely white finish that will stand the test of time. Plaster casting is often favored by artists over and above silicone or polyurethane rubber, and for good reason at that. In fact, it is the material of choice for making life castings as well.

However, the plaster used for castings is not the regular plaster of Paris as it tends to get chalky and flaky and will not be able to hold details well. Special plaster powders are available that have distinct additives and have been heat treated which alters these natural properties of plaster. In this way, it becomes suitable for fine art casting as the plaster cast can hold details without chipping or cracking.

This material is quite easy to use. Just mix the plaster powder in the specified quantity of water and it will be ready to use. Keep in mind that the water should be at room temperature and it is better to add the plaster powder to the water and not vice versa. The mixing can be done by hand (with gloves) or an electric mixer while taking care to avoid air from entering the mix as it can lead to air bubbles in the cast.

The plaster mixture is quite workable. One of the secret tricks is to apply a thin coating all over the surface of the mold and allow it to set a little. Then pour the mixed plaster slowly and in a thin stream to avoid air pockets.

It will set and cure naturally to a fairly hard structure. In fact, the cast should be demolded when it has set hard, but still feels a little on the wet side. There is no need to worry as the plaster can still be carved or tooled even after it has cured. Just sprinkle some water to wet the surface and it will be ready to use.

Another tip is that working with plaster can get quite messy. Therefore, artists prefer to clean as they go to keep the dust and waste from piling up. Also, keep in mind that plaster should never be applied directly on the body as the material releases heat as it cures which can cause burns at times. However, plaster bandages are sometimes used to make form body molds.

Best option


CastRite Art Casting Stone is a fine plaster powder that gives a natural, bright white finish to the castings. It can be used for making figurines, statuary, picture frames, life castings and even restoration works. All castings will turn out detailed, strong and durable. Enjoy the smooth plaster surface finish in the casts and life casts!

Working with Mold Making Latex Rubber

Latex rubber molds are easy to make, economical, last for years and can be used for multiple castings. Following are a few pointers to be kept in mind when making a latex mold through the brush-on method.

Latex rubber is considered the best material for making molds – it trumps in terms of affordability, durability, reusability, convenience and more. The molds turn out flexible and can be used to capture a negative impression of statues, figurines, plaques, life castings, etc. The most complicated models can be easily captured down to the minutest details.

In fact, latex is formulated in liquid form to allow ease of use for making molds. Take Kreemtex Premium Liquid Latex for Mold Making for instance. The liquid rubber can be brushed, sprayed or poured over the model to capture its shape in a mold. The thick consistency makes it easy to apply and also allows for easy coverage with minimum coats. However, if the rubber seems to be too concentrated, it can be thinned to a more viscous consistency by adding distilled water to get the requisite runniness.

Latex rubber should be stored in a cool place; it should not be allowed to freeze as this will make it unusable. It should be stirred properly prior to use. In case the ammonia content of the latex has evaporated or diminished over time, it is better to replenish the same before use. However, the ammonia should come from a chemical store and not grocery ones as the latter contain more of soap. Add a bit of ammonia at a time till the original texture is obtained.


How to apply?


Brushing multiple coats of latex over the model is the most common method of making a latex mold. Some models may have to be sealed prior to late application. Applying a suitable release agent is preferable.

Start from the top of the model and brush the latex in a thin and even coat while making sure that all air bubbles are brushed out. From the bottom, continue out to form a two inch flange which will serve handy when using the mold for casting.

Allow each coat to dry properly – it should be dry to the touch - before starting the next one. Here it is advised to apply the liquid latex in a checkerboard fashion by alternating the direction of application. This will ensure that the mold does not shrink and the dimensions do not change. A heat source can be used to hasten up the drying between coats.

Once the desired thickness is built up (will take 10 to 12 coats at least), the mold can be removed from the model and allowed to dry further for 72 hours or so. Curing in a warm atmosphere to ensure proper strength and toughness to the mold.

Molds made from Kreemtex Premium Liquid Latex for mold making will be stable, tear resistant and can be used to cast different materials. The outcome will be perfect as long as the proper procedure and precautions are followed!